
 Sign In

Process diary: Bodies and blocks
Creating pattern blocks is a matter of matching up numbers with reality. Making ours better and more efficient (more consistency, fewer fittings) is a project we’ve been working hard on.
I’ve been thinking of this learning process as “zooming in and out” to truly understand an issue. We zoom out by looking at the big picture data, then zoom in to look closer at individuals. It’s the combination of these views, refined over time and with testing, that’s helping us adapt our blocks.
Blocks defined
First, let me explain what I mean by “blocks.” A block is an existing basic pattern that you modify to create various styles, either by manipulating and moving darts, adding or removing fullness, transferring seams, or adding style lines.
A block can really be any pattern you use for this purpose. As home sewers, we usually think of this as a very basic, fitted woven dress since this is a very versatile place to start. But you can really have all kinds of blocks.
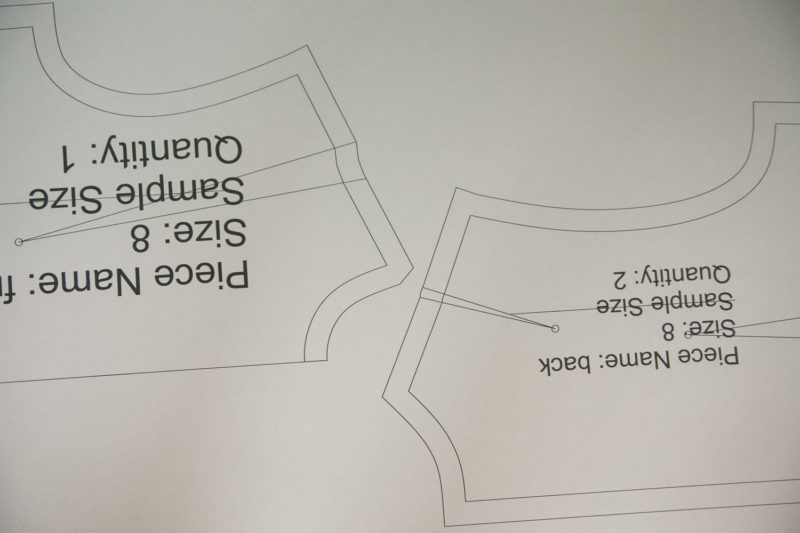
A pattern like this could be draped, or it can be drafted from measurements. Either way, it’s created for a specific size. Patterns are drafted around the middle of a size range, then graded into larger and smaller sizes. We have two size ranges, what the clothing industry would call “misses” and “plus.” The reason is that these represent two different body types, not just sizes.
So before diving in to create a new block from scratch, you have to understand the body (or bodies, if you are creating different blocks for different body types) that you are designing for in a few different ways.
This is what I meant when I mentioned “matching up numbers with reality.” I’ve come to think of this as big data and little data. It’s like zooming in and out.
Big picture: zooming out
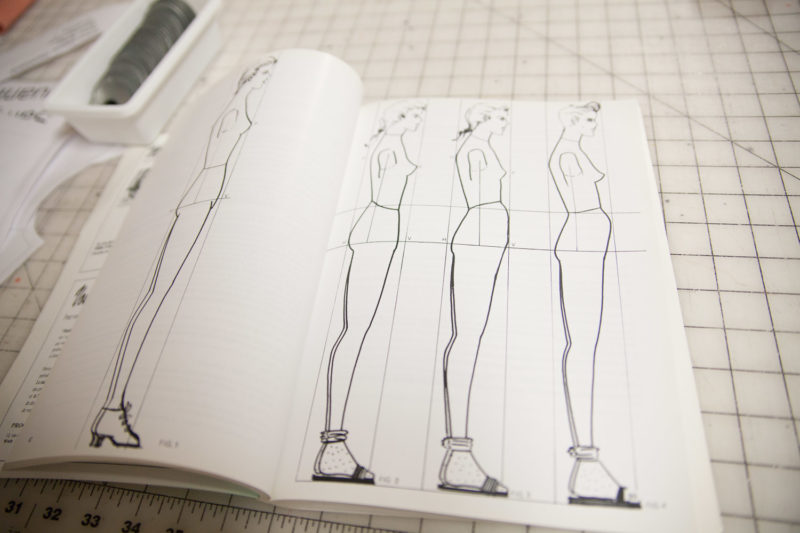
We zoom out by first looking at the measurements of large populations of people and seeing what the standards and averages are. ASTM is a standards organization and a great place to start for learning how the measurements of a large population can be translated into apparel sizing.
But there are other resources too. Books and published papers cover studies on this sort of thing, and you can really geek out on what they tell you about the human body. These were particularly useful when studying populations over a size 18, because much of the information out there is out of date or conflicts with more modern studies.
That is the zoomed out view. It’s the big picture, which can still sometimes be a little fuzzy in places. It’s where we started, since all of this “big” data has been used in our sizing from the beginning.
But when we decided to update our whole fit system and revisit our blocks, obviously a bunch of numbers is not enough. We wanted to see how these numbers play out on actual bodies, and then we needed to test the new blocks we drafted on real women.
Smaller picture: zooming in
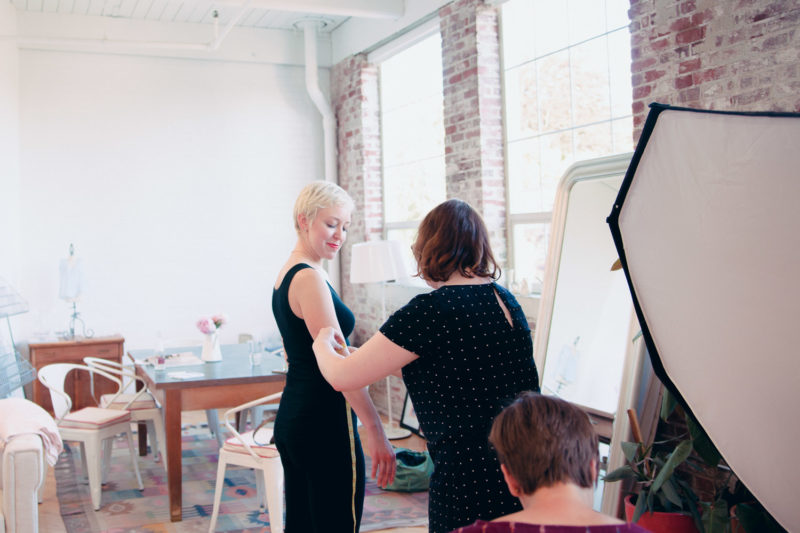
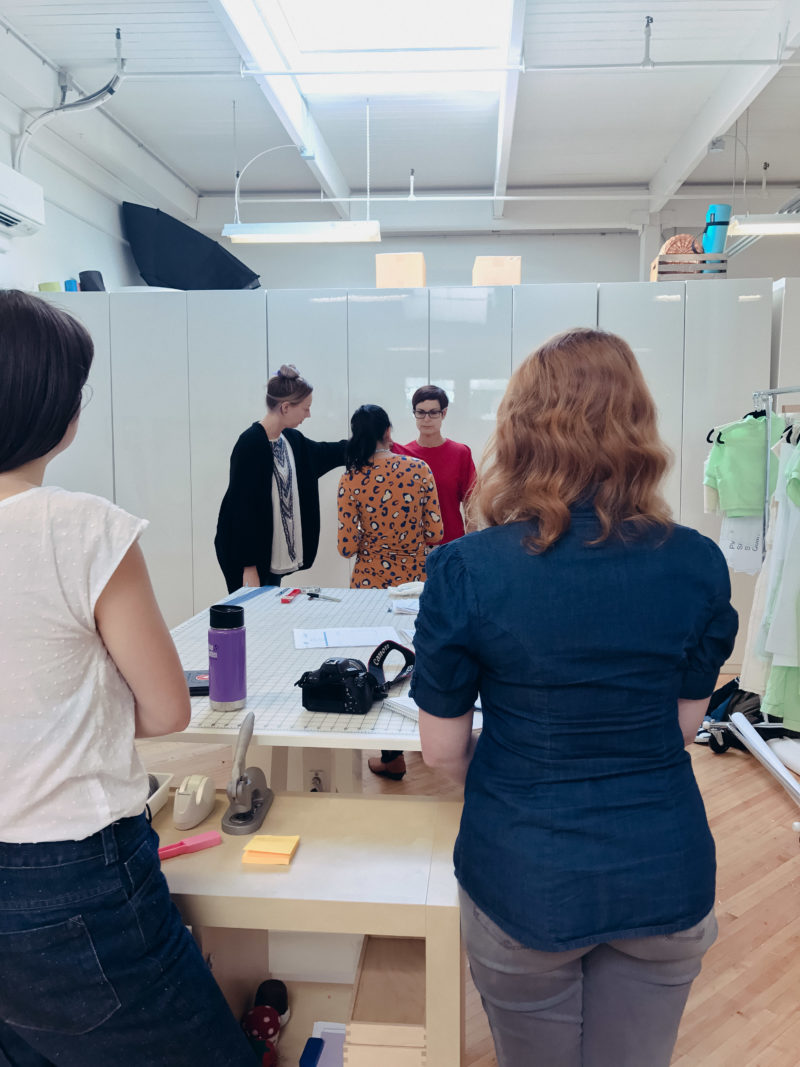
We started to zoom in. This is the part where we look at real people, real bodies, and make sure that we’re understanding what we’ve learned correctly.
A while back, we invited a whole bunch of women to our studio to be measured. We asked for women who are close to or matching our base sizes, recorded tons of horizontal and vertical measurements, took photos, and charted them all. We wanted to see how real women compared to averages (which are just that), how they tended to pick their sizes, and also to get a hands-on feel (literally!) of what those measurements really mean and what they look like.
Even though it was a small sample size of about 20 women, we did notice some interesting patterns that perhaps were not as easy to grok when looking at a chart (especially with regard to curves).
So that was how we started to zoom in, which is all well and good for getting initial measurements to draft blocks with and understanding those measurements. We could use the measurements to draft new blocks, a standardized process of charting measurements in order to adapt from 3D to 2D.
With those in hand, the patterns could be tested on fit models. These fit models are selected to match up with our base sizes, which is based on all the information we’ve collected. So now we have gone from a very wide perspective to a very specific, individualized human perspective.
We began testing drafts on them, now with help from our senior pattern maker. We began with skirts and bodices, saving sleeves for last. Because as our other patternmaking consultant cheerfully said during one of our fittings, “perfect armholes make perfect sleeves,” which could maybe be a metaphor for this whole process.
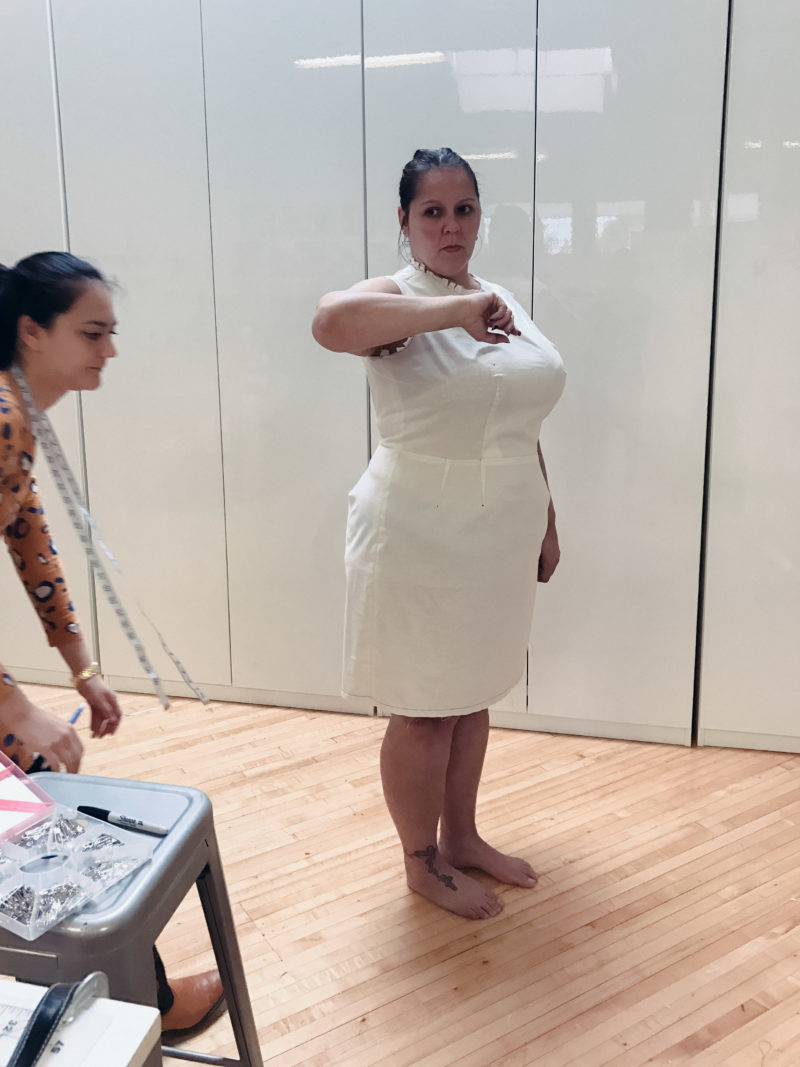
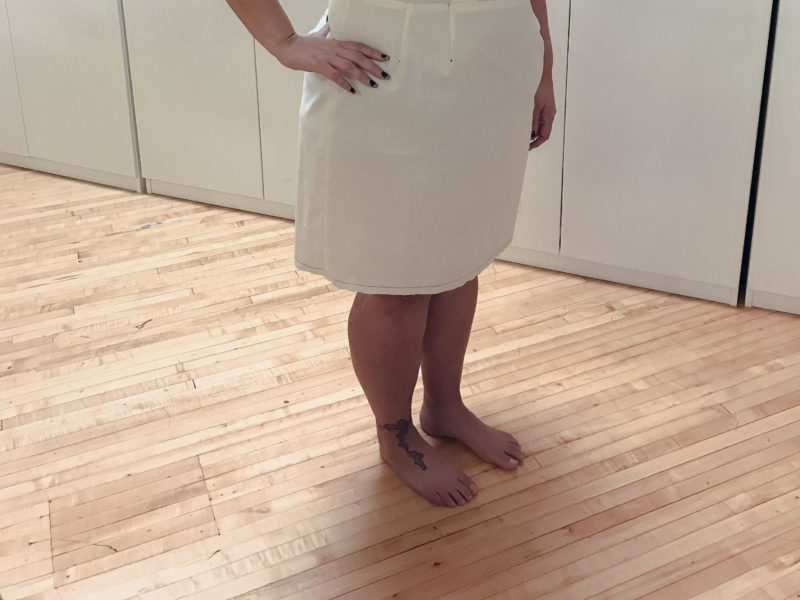
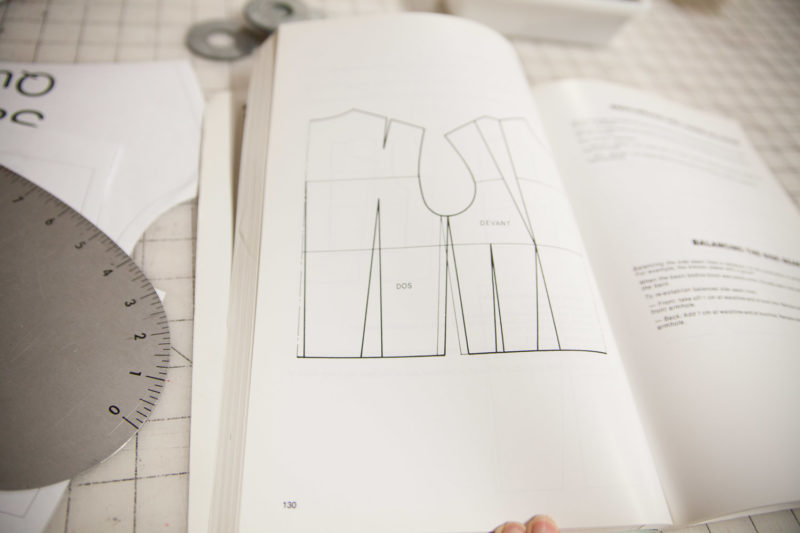
(Above is a block in progress.)
This is perhaps the most zoomed in view, making tweaks and adjusting the fit on the body until it’s just right. I plan to write another diary post on learnings around fit process, which applies to blocks and any other patterns. It’s definitely the biggest piece of the puzzle.
Key learnings
Here are a few of things I’ve taken away from revisiting our blocks:
- Data isn’t enough. It’s important to get a hands-on feel for what that data means. Measuring women in real life and coordinating this with the numbers was helpful for bringing the data home before drafting.
- It’s hard to find people who fit “standard” sizing – even harder than we thought.
- There’s a lot of conflicting information out there about plus size apparel and sizing. Working with real women (and finding the right fit model) was vital for understanding the patterns and similarities and representing all body types well.
- Working with one piece at a time (bodices, skirts, sleeves) helped us avoid conflicting changes among pattern pieces.
- The most important part of all this is the actual fit process, which deserves its own post. That’s what I’ll talk about in a later process diary.
I hope you enjoy seeing some of the thinking and processes we’re working through behind the scenes here. I’m hoping to use this series to share some of the learnings we’re taking away from the apparel industry, which may even inform your own sewing or creative processes.
Comments
Carol
November 15, 2016 #
Love this. Thank you so much for taking the time to do your own research and for sharing the process with us.
Monica
November 15, 2016 #
Great post! I felt like I was at work… ! (I’m a TD/patternmaker)
I agree, it is so hard to find fit models. I love working with Alvanon in regards to bodies/shaping/sizing, but their research comes with a hefty price tag. Do you have base and jump size forms as well? Always so much cost to invest in these things!
Sarai
November 15, 2016 #
We have several forms, and I’ve heard such good things about the Alvanon ones! We don’t have all the jump sizes, though. That would be a dream. Maybe something we can work toward in terms of cost and space!
Toni
November 15, 2016 #
I also think the fit of smaller bodies should be explored. Small things, like reducing the fullness of skirts and bust size. I find most patterns seem to scale down from a mid size and just like plus size, the smaller sizing is not an ideal fit without making extra adjustments. I know as a seamstress, that’s part of my job in the fit of the muslin, but if I find a pattern/company where I don’t have to make so many, I’m more likely to purchase their patterns without hesitation.
Sarai
November 15, 2016 #
Thanks for the feedback, Toni. Meg and I were just discussing this a few minutes ago, actually!
Lisa
November 16, 2016 #
Yes please from a smaller body here!!! That is a great idea, I started sewing because I couldn’t find anything to fit but most of my project time is spent in technical drawing not only for fit but to reduce bulk or shave off femininity that I sadly wasn’t blessed with!
Kirsten
November 20, 2016 #
Yes please! I’m petite (short) and generally small and very few patterns or fit techniques are geared that direction – for example, I usually have adjust length above and below the bust and often at the shoulder. Generally at least 3-4 inches in the bust alone (which makes sense since I am 7 inches shorter than “average”) . I really want a seamwork dedicated to “extreme fit” – for the very tall, very short, very something ;-)
Grace
November 15, 2016 #
Bravo! From an industry perspective, you are doing this more than right. Where I work, we’ve been fighting just to make the time to revisit our Missy and Plus size blocks. Meanwhile, our production calendar never stops. I’m so impressed by how you are tackling this project and I’m very much looking forward reading more. Also, I’m super jealous of your fit space. Having those tables right there so that you have everything on hand to do the work is such a luxury.
Grace
November 15, 2016 #
Also, our Missy and Woman fit models are not actually that close to the average Alvanon forms that we use as the basis for our blocks.
Sarai
November 15, 2016 #
We found it necessary to pad our size 20 form to better match our fit model. The form seemed more like a scaled-up version of a smaller size than the body type we saw in real life. Of course, our forms aren’t alvanon ones either, but it’s been a good solution… now things look the same on the form as on the model!
Caitlyn
November 15, 2016 #
I’m deeply curious about the process of choosing a fit model. Do you rule out individuals who have asymmetric or otherwise “non-standard” features? For instance, if an individual has the right bust, waist, hip, and height measurements, but has one shoulder higher than the other or a swayback, is she considered not a suitable fit model? How would you go about determining whether, for instance, someone *has* a swayback? Are there average measurements you can compare to, or do you ask the person if she typically has the fitting symptoms typical of a swayback, or is there some other strategy for sussing it out?
Sarai
November 15, 2016 #
Ooh, these are great questions. One thing that helped us right off the bat was hiring a professional fit model, because they’re hired by many companies specifically for a standard size and shape. They are extremely aware of their bodies and can tell you exactly how they differ from the norm (for example, one of our fit models told us her arms are a little long). We combine this with detailed measurements and, of course, we can visually assess them and also observe consistent issues over time. We even have them try on RTW garments from time to time.
But I’d say the main tool is measurements. It’s much more detailed than bust, waist, hip… there are perhaps 40 or 50 measurements.
As for asymmetry, everyone’s got it! You just have to try to minimize by finding more symmetrical models and being aware of where the asymmetry is. One of our pattern makers even pointed out that one of our fit models has a slightly higher shoulder on one side, a very tiny difference we hadn’t noticed previously. Her instruction was to consistently fit to one side of the body when making adjustments. It’s a very small asymmetry, but super helpful once you are aware of it.
One option we haven’t explored yet but could be useful is body scanning. One of the pattern makers we’re working with has a body scanner, and even scanned me a while back (talk about asymmetry!). You can use these to create 3D models and fit directly on them with CAD before creating a first prototype. I imagine you could also compare these to “standard” 3D models. We haven’t really used this option yet but I think it could be interesting.
Lesley Scott
November 15, 2016 #
Fascinating post Sarai, thanks for taking the time to explain. I concur with the comment about good armholes making great sleeves. I’m a bit of an arscye/sleeve perfectionist and recently fitting my daughter got it almost perfect, I kept telling her how good the sleeve armscye fit was. It took 3 or maybe 4 toiles, ripping out sleeve after sleeve, raising the cap, lowering the cap broadening the bicep to broaden the cap, then reducing the bicep – phew, exhausting. So good that you guys are putting so much effort into your blocks. I do hope you’ll share an old block compared with changes – that would be really interesting.
Claire
November 15, 2016 #
Thanks for sharing! Have you thought of looking into patterns that change based on a person’s measurements, like Make My Pattern or Lekala?
Susan
November 15, 2016 #
My question is, what type of body shape are you fitting your blocks for? What type of body (pear shape, straight, etc.) is your company pattern focuses on? Is your company focusing on the standard industrial fit measurement; or are you trying to generate a fit block base on C cups or D cups body? The reason why I asked is because even if you get the average data from various women, fitting issue will still be there. If you can give the buyers a clear sense of what type of body your patterns are intended, it’ll be helpful for the buyers to determine if it is worth the time and effort to manipulate it in order to get the right fit.
Sarai
November 15, 2016 #
Correct me if I’m wrong, but I think that what you are saying is about communicating the shape to customers (pear shape, hourglass shape, etc). Is that correct? I think you are saying that even if a pattern is built to a standard intended to fit most women (which is what RTW standards are designed for, and that is essentially what we are using), women with particular figure variances will still need to adjust, which is absolutely true – and why many of us sew our own clothes.
One thing we are working on is expanding our measurement charts to include a lot more of the information people will need to assess this. We’re planning to make a lot more measurements available than what fits on the back of the patterns, so people can compare easily and assess changes before they even make a muslin. That way, the information is a lot more specific and easy to act on. If you are pear shaped, you can take a look at the measurements and see where you need to add ease.
The way cup sizes are measured actually varies a lot! It varies from country to country, and even within the same country there may be no standards. One person’s 34C could be another person’s 36B. With that said, our misses range uses what would be described by most as a small-side C cup, and our plus size range has a model with DD cup. Just keep in mind that these mean different things to different people – if you went into three different bra stores with the same measurements, you might be fitted into three different bra sizes. That’s why so much advice for women about bras circles around “you’re probably wearing the wrong bra size” – because the standards are not clear. I know it’s still helpful info, just a minor caveat.
Kate
November 15, 2016 #
This is so thorough! I love hearing about the nitty gritty details. Would you consider releasing your blocks as a ‘Shell’ pattern for people to work with? I feel like other shells or blocks available are following old standards that haven’t put in as much current work as your team. I think home sewers who are comfortable with pattern making would really benefit from what you have fine tuned here :)
Maudie
November 15, 2016 #
Thanks for this post! I’d also love to see photos of what a “perfect armhole” actually looks like, especially w movement (arm up, reaching forward etc)
Sarai
November 15, 2016 #
That is a cool idea, I wonder how we could photograph it since armholes are different with a sleeve vs. without. Maybe illustration? I’ll think about it and get some pattern maker input. :)
Patty S.
November 16, 2016 #
Oh wow, this was SUCH a good post! I hope you continue this topic to include how to move from the block pattern (sloper), to translating that into your patterns. I’m about ready to take some patternmaking classes because my figure is so atypical from most other women’s figures. More apple, with no hips. It can be very difficult to modify traditional patterns to my measurements and get a good fit. Where it really gets tough, is making pants/shorts Trying to regrade a smaller pattern to fit my larger than proportion waistline is really tough. And, I’m not a plus size, sort of “in the middle”. Your post is so informative, and I hope you talk a little bit about how to make that next step – translate your blocks to a pattern, how to re-grade for any odd body measurements of figure challenges. Learning so much, even having sewn for decades! Of course, if I just dropped those pesky 30 lbs I’ve packed on over the years, my issues would be moot, lol!!
Diana
November 16, 2016 #
I deal with those same pattern adjustments! It’s tricky when you have several major elements to change, like length and fullness and slope of shoulders. You try fixing one and it throws off another!
Even though I always have to make the same kind of changes, I need to start from scratch with each new pattern, because there’s no point of reference between them. It would be extremely helpful to have access to the block it’s designed from. If I know what I need to do to the block, I’ll know what I need to do to the pattern.
I LOVE that you posted this and I’m eagerly looking forward to hearing about the process! Don’t skimp on the fussy details. :)
SJ Kurtz
November 17, 2016 #
I’ve been bigger and smaller and a LOT SMALLER (size 00 to 16 in 30 years, ask me how!) and fitting the pattern to me from the envelope has always been an issue. Even more so as a dinky person than a bigger one (it was harder to go smaller than the smallest size; you can’t see the point where you’ve destroyed the pattern style proportions until you’ve passed it).
It’s really helpful to know what the fit model is (height, weight, cup size) AND to mark measurements on the pattern at the hip, waist and bust point to make the inevitable alterations easier. (how about the sleeves?) Those marked numbers are GOLDEN information, and I use patterns that incorporate them more than those that don’t.
Christina Way
November 16, 2016 #
This article has been very helpful. As an older plus sized woman, I’m sewing for a body that I didn’t have when I was 21-55 years old. I still like classic styles, but they are hard to find unless you draft your own pattern. In my opinion, most plus sized patterns look dumpy. I’m not trained in pattern drafting so I’m trying to get up to speed with the basics. Hopefully this series of articles will point me in the right direction and fill in many of the gaps. Thank you.
Robin
November 16, 2016 #
I have sewn from the time I was a new adult until now, when I am 55 and have finally gone through the most dramatic body changes I expect to have. I look around me at other women my age and find we have a lot of the same changes in common that need to be made, which I can sum up through these adjustments on a typical oxford button-down shirt: lower the bust 1″, add a full bust adjustment of about 1″, add to upper back (to account for the newly acquired hump) of about 3/4″; and for waistbands, increase the waist about 1.5″ for about 9″ down to the hip, which is about the same. I also lengthen pants but that’s usually a personal or style based preference, and not due to age changes. If I can’t get there from these few changes listed above, I don’t bother. I no longer expect pattern companies to be interested in designing for these age related quirks, however common, but I do offer these observations to you, as it has helped me to see there are a few things I will always have to adjust, but it’s not so much that it makes me tear my hair out (what is left of it, that is). ?
Kath
November 16, 2016 #
I really like this consise post. For many of us this sums it up well, add to that the mysterious disappearing derrière adaption and that’s it. I do 2 upper back inserts one small one at just below the neck. The second is a little further down the back where the hump begins. This gives a smoother grade to the back even though they are both tiny insertions in terms of size.
Lynne
November 18, 2016 #
Thank you for those helpful hints, which I will definitely put into effect on my next project — no kidding. I was so frustrated recently when a shift dress I’d purposely made with plenty of ‘give’ was uncomfortably tight low on the hips. Another frustration is that wide necklines look less appealing on mature throats. I love “V” necks, so flattering, but I widen the shoulder on the neck edge very slightly as I find it more flattering if the fabric skims the throat on the shoulder line. Yes, it’s time for the additional fit category of “mature” to be offered by pattern companies.
Robin
November 18, 2016 #
I appreciate the tip on the neckline, that should really become another standard adjustment for me on all V necklines as well. I too prefer a V style, and choose traditional collars with plackets for the reasons you cite.
Dara Harper
November 16, 2016 #
Thanks Sarai, you have got to be the “hardest working woman in the pattern business today”. Thanks for all you do!!
Sarai
November 16, 2016 #
I don’t know about that, I’m fortunate to have lots of wonderful people alongside me. :)
Susanna Prince
November 16, 2016 #
Thank you for sharing this information and your behind the scenes process. I am sooo excited to hear that you’e planning to provide more measurements for easy pre-muslin comparison! I so often wish for that.
Elizabeth
November 17, 2016 #
This is great to see your process, and I so appreciate you guys for being open to refining things to fit more people. I’ll echo the others asking for smaller bodies too. There’s a lot of really great pattern companies that I don’t approach because I fall outside of the range on the small end. Yes, I can grade things down, but it’s always nice to have something that’s closer to reality from the outset.
Kirsten
November 20, 2016 #
I’m a data scientist, so I have to ask – where did the original measurements that your models needed to fit come from?
Sarai
November 21, 2016 #
They came from the ASTM standards. We’ve used those from the very beginning. That’s what I meant when I said “It’s where we started, since all of this “big” data has been used in our sizing from the beginning.” They’re the published standards apparel manufacturers use to match sizing with the most current population data.
Based on that, we pick a size in the middle of each range, and find a model that best matches those measurements.