Tutorial: How to sew a flat felled seam without a specialty foot
This month is Celebrate the Boy month, hosted by Rae and Dana!
Now, I’m not known for kids patterns (I leave that to the experts like Oliver + S and Figgy’s), but I do agree that boys of all ages sometimes get short shrift in the sewing department. There’s no reason for that, because sewing menswear (and boyswear? Is that a word?) is a true joy.
But one thing that helps in getting a beautiful result when sewing for men and boys is understanding the right techniques to apply. And one of the most common techniques in sewing for guys is the flat felled seam.
What is a flat felled seam?
A flat felled seam is basically an overlapping seam that’s sewn flat. It’s used frequently in menswear because it’s extremely durable and sturdy, in addition to providing a neat finish. If you’re wearing jeans, take a look at the seams. They are almost certainly flat felled. They’re also used throughout our Negroni shirt pattern. Use a flat felled seam on shirts or trousers, which see a lot of stress, and you’ll get a durable finish.
How do I do it?
There are multiple ways to sew this kind of seam. There’s even something called a “mock felled seam,” which Caitlin is going to share here on Monday (stay tuned).
Now, there’s a specialty foot available for many sewing machines, known as a “felling foot,” or a “lap seam foot.” I’ve also written a tutorial today for sewing a flat felled seam with the specialty foot, but this post is dedicated to doing it with just your regular, run of the mill, standard presser foot.
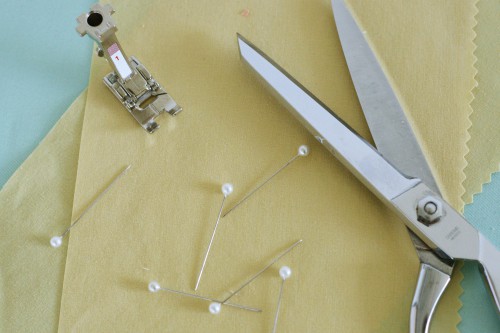
Tools needed:
- Fabric shears
- Pins
- Standard presser foot
- The two pieces of fabric your joining together
- An iron
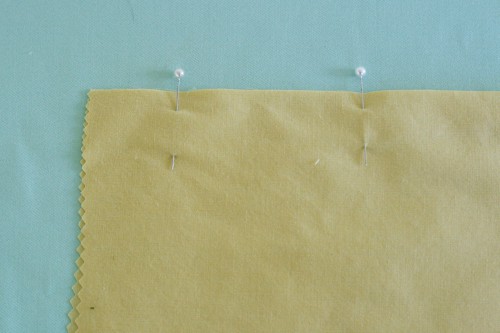
First, pin the seam, with right sides together, just like you normally would.
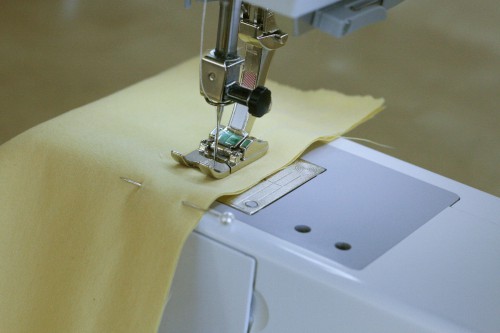
Now sew the seam normally, using a 5/8″ allowance, unless your pattern specifies otherwise.
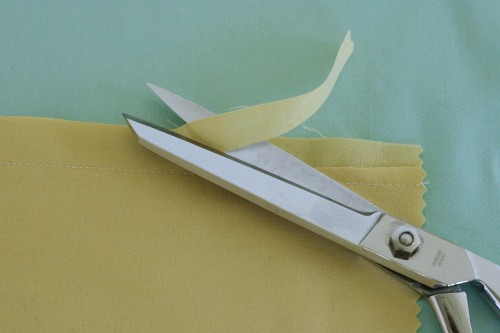
Take your shears, and trim one side of the seam allowance, so that it’s half the width of the other seam allowance.
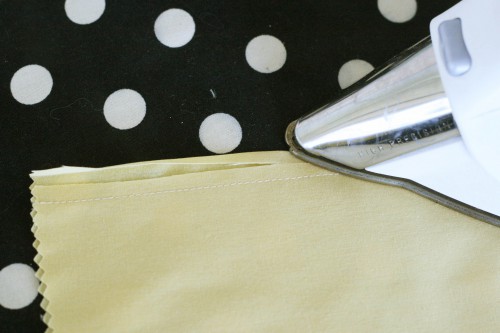
Fold the wider seam allowance over the narrower one and press. For the strongest seam, you want the raw edge of the wider side to come all the way to the stitching line (ours looks a bit short in the photo).
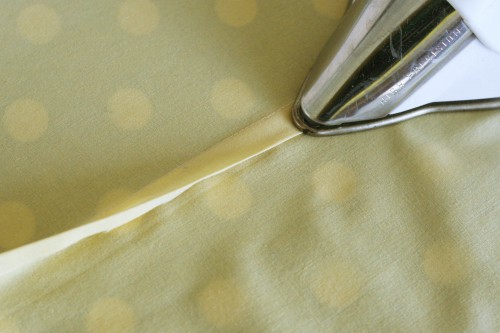
Fold the whole seam allowance over and press it flat. As you can see, all the raw edges are neatly tucked within.
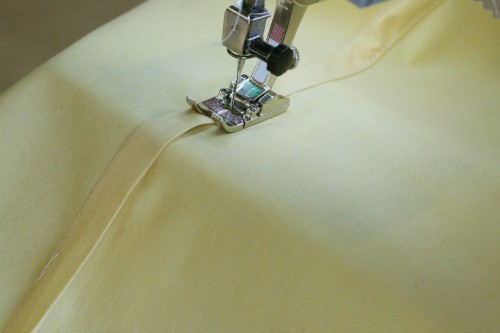
Finally, edgestitch the seam allowance in place.
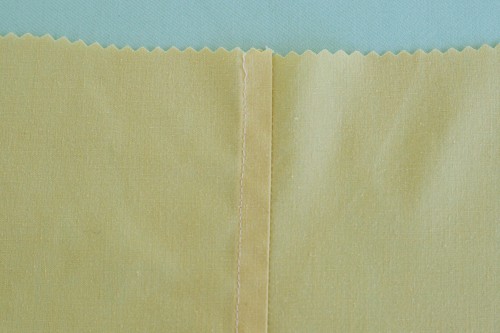
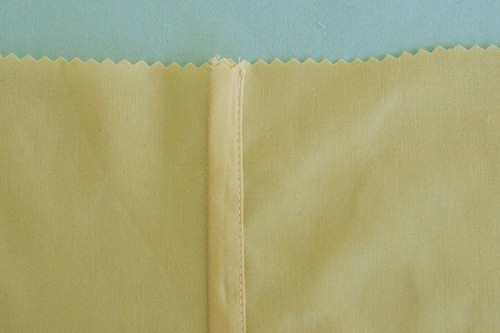
This is the finished seam, on the right side.
And this is the wrong side. You can actually use either side of the flat felled seam on the outside of a garment, it just depends on what look you prefer for the item you’re making.
If you’re interested in learning how this is done with a specialty foot, check out my second tutorial today: Sewing a flat felled seam with a felling foot. And finally, be sure to stop by the giveaway I’m doing for the Negroni men’s shirt pattern and enter to win one, so you can try this out on the grown-up boy of your choice.

 Sign In



Comments
woolcat
February 18, 2011 #
Thanks for (both) tutorials! Nice!
Now I do have a question. Can this be used on women’s clothing too? Is it possible to use it on a curved seam or will that look like arse?
Sarai
February 18, 2011 #
It depends a bit on how curved the seam is. For a slightly curved seam, it’s not a problem, but more curved seams can be difficult. I do explain a special technique for doing the flat-felled armholes in the Negroni pattern, or there’s also a really good explanation in the book Shirtmaking by David Page Coffin.
And yes! They are definitely used in women’s clothing as well, whenever extra durability is needed. You see them most in causal clothing.
Karen LePage
February 18, 2011 #
oooh great, I’ve specifically been looking for flat-felled armholes because it makes an amazing difference in the feel of the shirt for the wearer AND the durability of the shirt through multiple washes over years. Thank you!
Rachel
February 18, 2011 #
Thanks for the explanation. I have been using French seams and then topstiching them down, but it can get cumbersome. I am going to be trying this on my next project.
sewer
February 18, 2011 #
I was taught the seams on jeans are similar to flat fell seams, but not the same.
Susan – Knitters Delight
February 18, 2011 #
OMGoodness. I just did my first flat felled seam last night. It came out very well, but I would have loved to see your tutorial first. I believe I have the speciality foot for this, but didn’t realize and did it without using it. Thanks for this. Very helpful.
Venus
February 18, 2011 #
Thank you so much for sharing. I’m going to try this on my aprons. :)
Caila Murphy
February 20, 2011 #
Yes!!! I am so excited that you posted this tutorial! I recently cut out a pair of pants for my son from the COOLEST camo fabric, but after cutting remembered that I had intended to make them reversible. I couldn’t think of a way to disguise the inside seam allowance, but now you’ve shown me how. Thank you!
Maija
February 20, 2011 #
Wow, what fabulous timing! I’m about to start on an adventure… making boxing shorts for my grown sons. THIS is the way to go! Now I just have to figure out the waistband…
mira
February 26, 2011 #
extremely helpful tutorial. I size XL thrift store shirts down for my husband who has loooong arms but is skinny, and have always had trouble with recreating the seams, especially along the underside of the arms. This tutorial explains everything I should have been doing perfectly; I cannot wait to try again.
Shelly Figueroa
March 4, 2011 #
Wonderful Tutorial and thank you so much for the mention!
Cory Ahern
March 22, 2011 #
Thank You Thank You Thank You!!! i have been puzzling this one out in my head for years!!! i didn’t even know what it was called, but i knew what i wanted it to be, so thank you so very much!!
:)
Astrid
May 26, 2011 #
Do you think this is a technique that could be used when sewing reversible garments? It looks so easy, great tutorial by the way! I would never have thought of doing that.
Sarai
May 26, 2011 #
Yep, it could be used on reversible garments, since flat felled seams can be on the inside or outside of a garment!
Jennifer
October 25, 2011 #
Awesome tutorial!! Clear and simple, easy to follow with great photographs. Thank you!
Anthony
March 16, 2012 #
Thanks! I was shopping for a felling foot, but I think I’ll try this first. And am I right in assuming that since both side are usable, you can start with wrong sides together?
chris
April 8, 2012 #
Great tutorial, thanks! I’m working on a jean jacket and was hoping you could help me understand how to approach the sleeves. Typically jean jackets have 2 flat felled seams on the back side of the sleeves. Stitching up the one is no problem but how do you approach the second or the seam that makes it a sleeve?
Thanks!
Deborah
May 8, 2013 #
Wondering if you found a way to flat fell that second sleeve seam. Currently working on a jacket with a 2 piece sleeve, and have also found that seam number one is no problem, but having trouble feeding the entire length of sleeve through sewing bed. Started seam from shoulder and thought I could travel as far as bed would allow me; then start from hem end and hopefully connect with the stitching from upper direction. Machine bed allows for even less distance from the hem end. Hope there is a trick to do this that I have been too thick to figure out!
Ross Hoodies
October 1, 2012 #
It’s nice of the writers to jot down step by step on how to sew a flat felled seam accompanied by the pictures as well in case for anyone who’s unsure. However, there are so many instructions to follow. If it’s just me, I’ll just send whatever that I want to be done to a tailor.
Gini Bailey
March 26, 2013 #
I am making a vest using a thicker upholstery type fabric with a white side and a black side. I want the garment to be reversible. would I use this seam for this? Im relitively new at sewing, I would appreciate any help you can give me.
Patricia
August 21, 2013 #
When making a flat felled seam on a man’s shirt, I can never remember if you top stitch the seam on the back of the shirt or on the front. Help!