
 Sign In

How to make an easy elastic waist Mabel

I have a sewing confession. Sometimes I am a lazy sewist.
I love that sewing is an activity that forces me to slow down and immerse myself in the process. It is meditative and relaxing. On the other hand, sometimes you just want to make something, not to revel in the process, but to have something new, practical, and quick! Mabel is a pretty speedy sew to begin with, but through my sewing-laziness I have found a way to cut about a half hour off that process. Which is a victory in my book.
Mabel, meet 2 inch elastic.
I wish I could say that this genius idea was mine, but Meg is the pioneer of this brilliant hack. One Friday while discussing weekend sewing projects, the lovely Meg mentioned that she likes to make her Mabel with an elastic band. Naturally I had to sew one up immediately!
This Mabel mini-hack also has an added benefit of lending your Mabel skirt a control-top-like quality. Making everything lay just a little smoother. Who doesn’t love that?
What you’ll need:
- Mabel pattern, traced if desired
- Recommended yardage
- 1 1/2 to 2″ elastic in a color of your choice, enough to wrap around your waist
- Pattern paper
- Tape
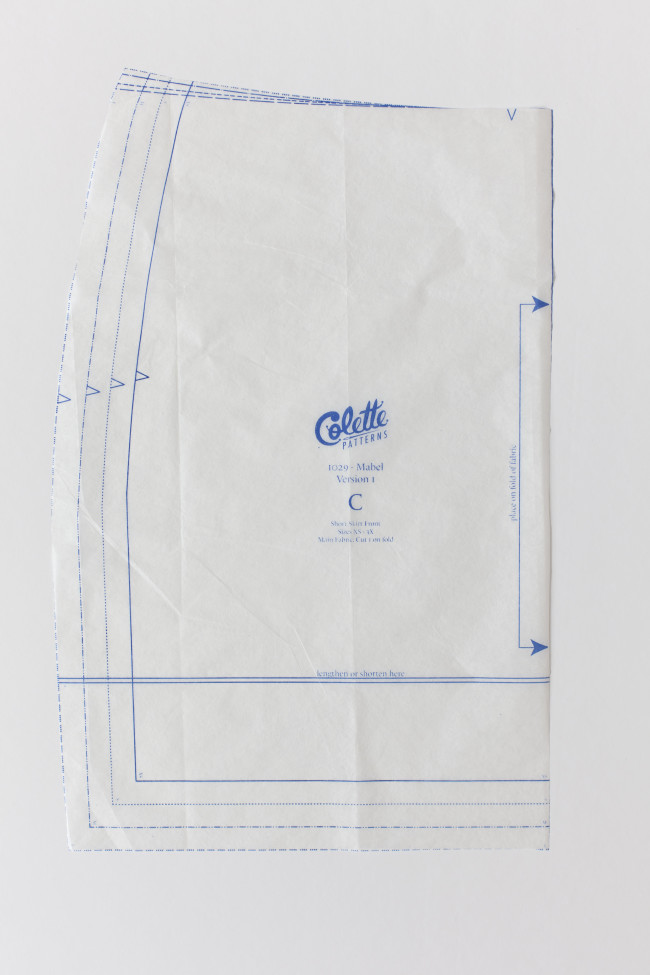
Begin by cutting out the pattern pieces for desired view. I chose to make Version 1.

Mabel is intended to be worn a few inches below the natural waist. With the addition of the elastic band, I knew I would want to wear this version higher at my natural waistline. Taking this into consideration I chose to lengthen by 4″.
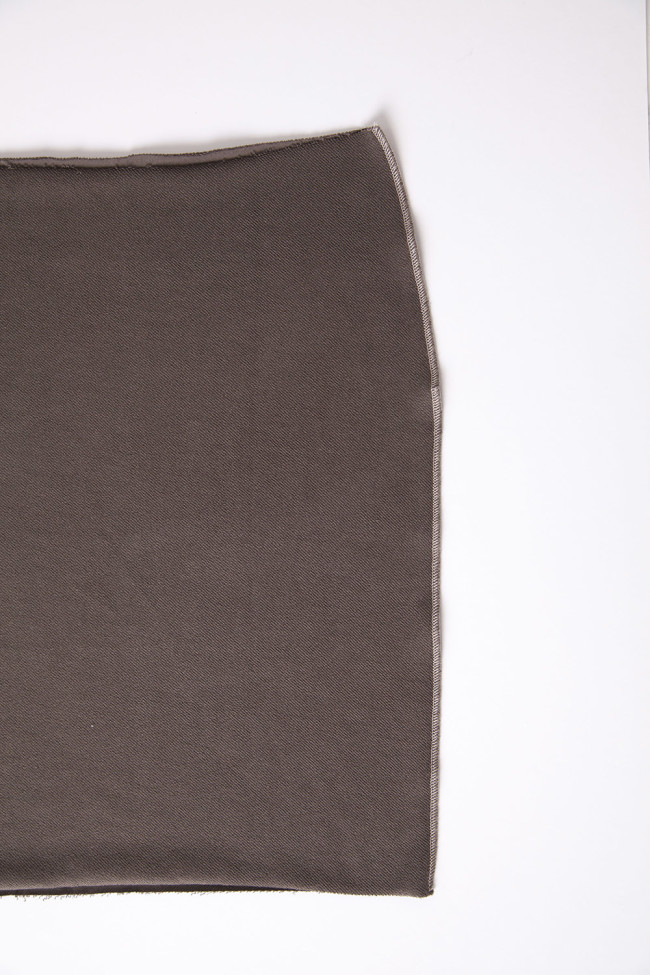
Cut fabric. Remember that you don’t need to cut out the waistband. Assemble skirt pieces.

Next, wrap elastic around your middle to determine length. Make sure you are measuring this at the exact location on your waist where you would like the waistband to hit. The elastic should fit snugly, but not too tight. Mark this point, then add an additional 1/2″. Cut elastic to marked length.
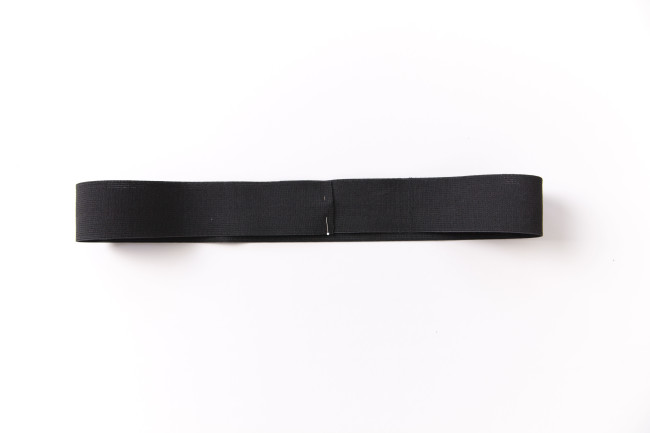
Pin elastic so that the two short ends overlap by 1/2″
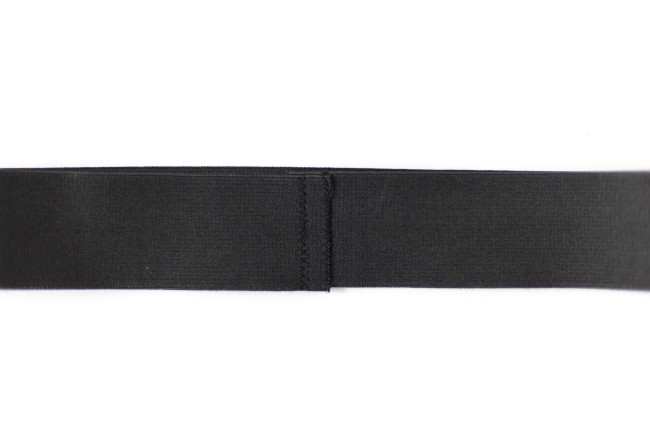
Join Elastic with two parallel rows of zigzag stitching. To reinforce the zigzag stitches, sew down the length of the cut elastic edge, backstitch back to starting point, then stitch forward again to secure. This creates an extra sturdy finish.
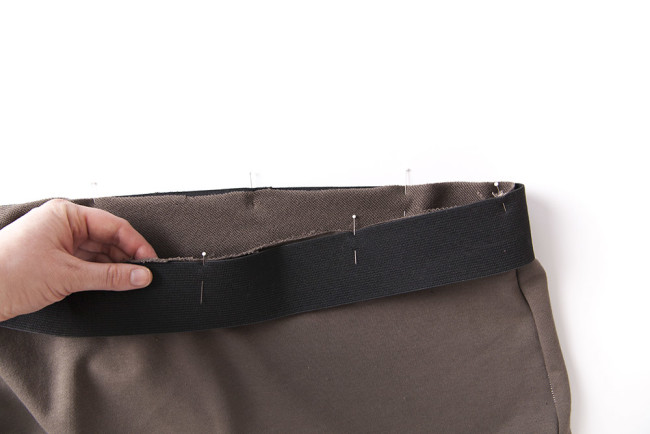
Pin elastic around waist of skirt, evenly distributing elastic as you pin.
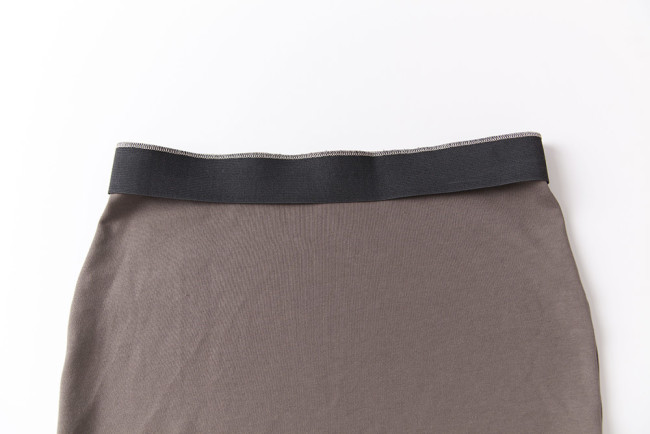
Use a serger, or stretch stitch on your home sewing machine to attach elastic to the skirt.
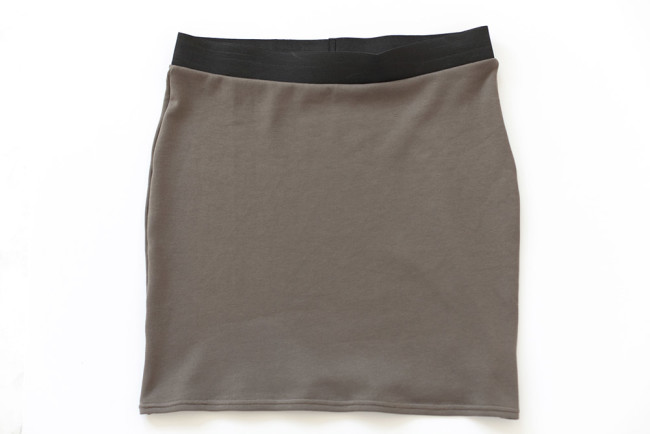
Hem to finish and enjoy!
Comments
Susan
May 18, 2015 #
I definitely need to do this! I love my Mabel skirt but the stitches in my waistband pop when I pull it on. My ancient machine doesn’t do very well with knits so I am blaming the problem on my machine. The bottom of the skirt is perfect and I think this idea will make the whole thing perfect. Thank you!
Toni
May 20, 2015 #
Please Please go buy yourself a new machine. You will be able to keep up with new styles and new fabrics. You will thank me forever.
Toni
Elsie
May 18, 2015 #
Such a great idea! Would it be possible to turn the elastic to the inside and topstitch it just below the waistband if you didn’t want the elastic to show?
Haley
May 18, 2015 #
Absolutely! That would look great! You can also sew the elastic to the wrong side of the waist seam, that way when this edge is turned to the inside it will have a nice clean finish.
Sophie-Lee
May 18, 2015 #
Elsie just make sure you add extra length to the top of the skirt first, and use a stitch that will allow for stretch when you’re topstitching!
Christine
May 18, 2015 #
I MISS THAT FACE!
Kate McIvor
May 18, 2015 #
What’s your favorite brand of elastic?
Haley
May 19, 2015 #
Hi Kate,
I don’t so much have a favorite brand as I do type.
I love flat knit corset elastic. It has a smooth finish, so it is comfortable to wear next to the skin. It also has great recovery. Whenever I can find it I buy it in large quantities!
Marianne
May 19, 2015 #
For me the best feature of the Mabel skirt is it’s shaped waist band. This hack is making it look like very cheap RTW. Too bad, cause with a curved, lined waist band, a well executed vent in the back and a carefully sewn hemline it’s one of my favourite skirts.
Christine G
May 19, 2015 #
Marianne, while I’m sure the Coletterie ladies will find your feedback useful in some way, I feel like it could have been delivered in a much nicer way. For some folks, this is what they want. Obviously, it’s not to your tastes, but was it necessary for you to say that? If this isn’t your kind of hack, you could have just moved along and not added it to your To-Try list. Instead you insulted Haley and every reader of this blog that thinks this hack is a good idea. Next time, perhaps you can stop and think about how your words might affect someone else.
Marianne
May 19, 2015 #
I can see what you mean, Christine. I had absolutely no intention of hurting anyone’s feelings. What I really meant to say was this supposed shortcut has its downside. Changing the shaped waistband for elastic won’t be a big time saver. However, by pulling the skirt up to sit at the natural waist the hip curve will end up at the wrong spot. That’s really something to take into consideration cause it changes the fit.
Haley
May 19, 2015 #
Thanks for the feedback!
I thought this was a fun way to simplify Mabel. I mostly intend to wear this skirt with untucked blouses, or as part of a casual weekend look. I also love Mabel’s original waistband, but I like to mix it up.
The hip curve for this pattern is very subtle, I did not find it to lay incorrectly on my body when lengthened and worn higher.
skye
May 19, 2015 #
I too am lazy and I love this idea! I really enjoy wearing knit skirts around the house and this will initiate a serious stash-busting extravaganza. Thanks for tip on the elastic.
Brenda
May 19, 2015 #
I have done this with my mabel using nancy zieman’s method from her blog-“The absolutely easiest way to sew an elastic waist”. I added my length at the top of the skirt and when you turn the elastic under it is all hidden nicely. Love it!
RSB
May 19, 2015 #
I am not a novice, but it is quite easy to do. It is very good to show new seamstress how to sew properly. Good for you.
Eileen
May 19, 2015 #
I think the hack is a great idea. However I do prefer the of covering the elastic band. I am not a curvy girl and have a thick waist that varies on an almost daily…..I said almost…basis. I very seldom ever wear shirts or blouses tucked in. Because of the waist I had shied away from Mable, now I am gona get it !!!!
Toni
May 20, 2015 #
Will you tell me how to cover with fabric? Does the fabric need to be knit?
Haley
May 20, 2015 #
For the elastic to be encased, sew the elastic to the wrong side of the skirt waistline, using your preferred stretch stitch. Then, turn this edge towards the inside of the garment. You can then topstitch the elastic down using a stretch stitch. This will result in a fully encased elastic waistband.
Julie
May 28, 2015 #
I can’t believe my timing coming across this post today! Last month I made my first mabel in a really firm grey ponti. When it came to attaching the waist band I stopped work on the skirt. I just knew that two layers of the firm ponti I was working with was going to be too thick across my waist. So because of this my skirt has been draped across the back of the chair in my sewing room for the past month. The method you have shown here is the perfect solution to my problem :) Thank you.