
 Sign In

Pattern Hack: How to turn Moneta into a vintage-style cropped sweater
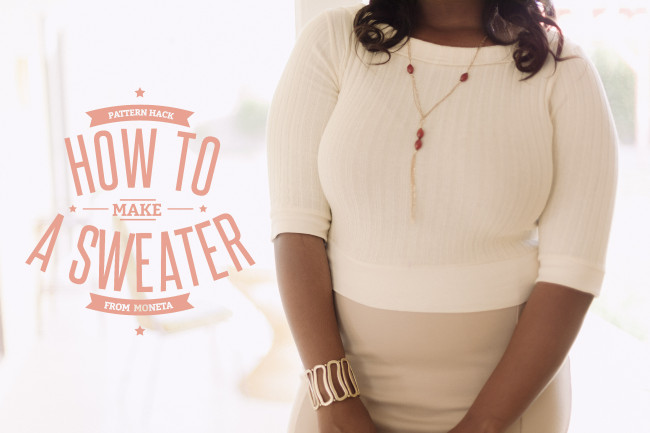
Remember this cute little cropped sweater?
For our photo shoot, we needed a top to pair with the Mabel skirt. As a knitter, I love the way short sweaters with a deep waistband look. It’s a style that was very popular for knitwear from the 1930s all the way through the 1950s, and is incredibly flattering on a range of body types.
Kristen and I had the idea of combining some techniques from The Colette Guide to Sewing Knits (namely, the banded hem and ribbed cuffs) with the Moneta dress to make a light sweater top.
The result was just lovely. It’s just like those cute little vintage sweaters I love to knit, except I can make it in an hour or two!

Use a sweater knit for the main body of the sweater and a tight, stretchy rib for the cuffs and waistband. Make sure the rib has good stretch and recovery.
Look at the cuffs and bands on sweaters and sweatshirts you already have to get an idea of what to look for. Your fabric store might have ribbed fabric made exclusively for this purpose, so if you’re not sure, ask them.
You can also use any of the free collar variations that come with Moneta. Because the sweater knit we chose has a ribbed pattern, we went with a simple rolled collar so that the stripes of the rib would look more natural. I’ll go over how to do that here, but if you aren’t using a fabric with a pronounced ribbed texture, just use one of the collar patterns.
You’ll Need:
- Sweater knit fabric for the main body
- Tight rib knit for the cuff and waistband
- Matching thread
- Clear 1/4″ elastic
How to:
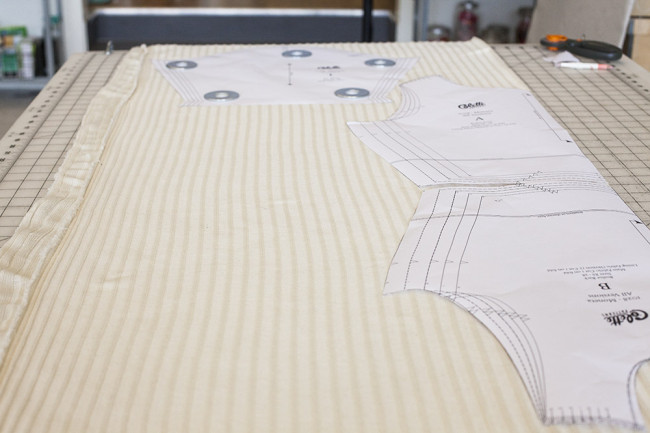
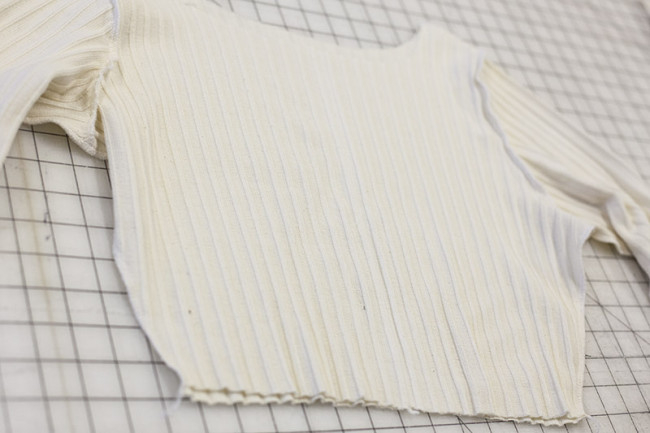
1. Cut the body. Using the Moneta pattern, cut the front bodice, back bodice, and 2 sleeves from your sweater knit fabric. Also cut the collar of your choosing (or see instructions below for the simple ribbed roll collar).
As you can see, our fabric is lightly ribbed, but yours doesn’t have to be. Any sweater knit you like should be fine.

2. Calculate the cuff and waistband width. Decide how wide you would like the waistband and cuffs. Add 3/8″ for the seam allowance. Double this number to get the total width.
For ours, we decided on a finished width of 1 1/2 inches for the cuffs and 3 inches for the waistband. That means we needed the pattern pieces to be 3 3/4 inches and 6 3/4 inches respectively.
3. Calculate the cuff length. Next, you’ll need to figure out the length for these pattern pieces. Measure your arm just below the elbow. Add 3/4 inch to this number. This is the size of the cuff, with no ease.
4. Calculate the waist length. The waistband will be cut in two pieces, so that the side seams match up with the side seams on the sweater. Measure your natural waist. Divide this number by 2. Add 3/4 inch to this number for the seam allowances. This is the length of each waistband piece.
Again, your waistband will have no ease. It’s meant to be fitted and cinch in at the waist. You’ll have a chance to get the fit just right before you sew it on.
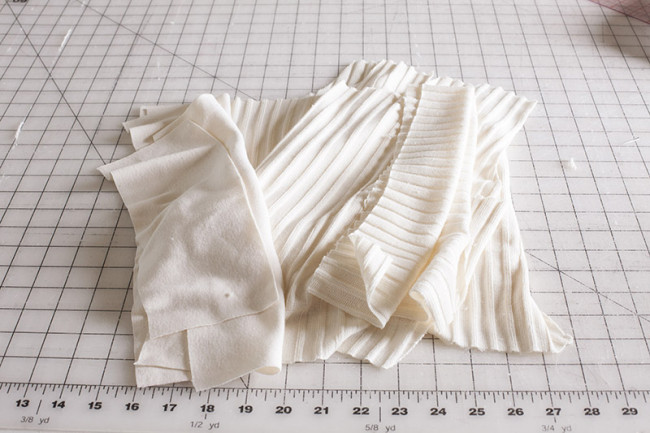
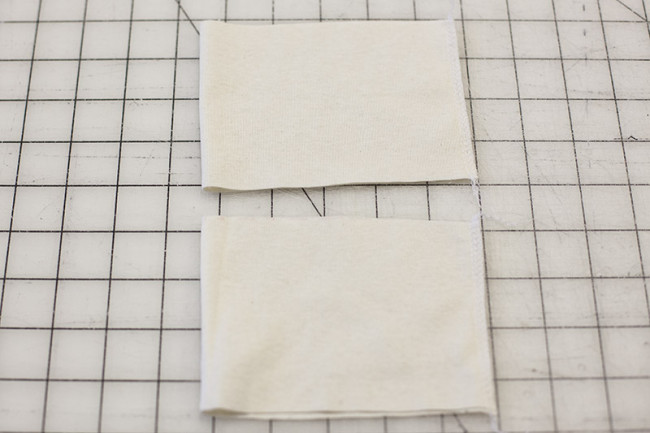
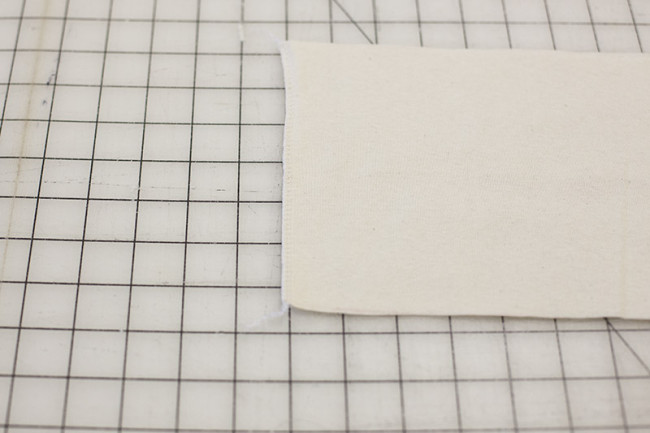
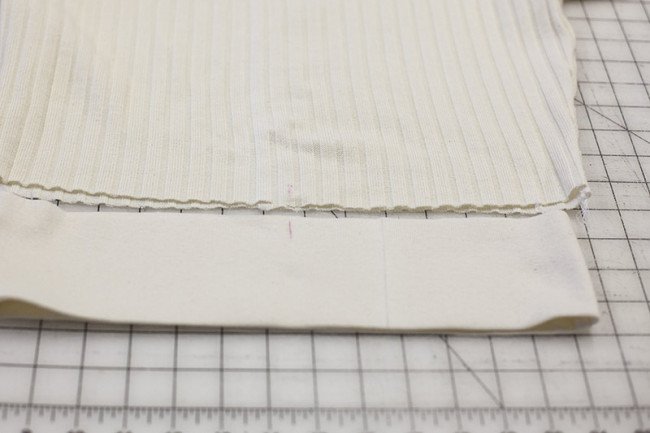
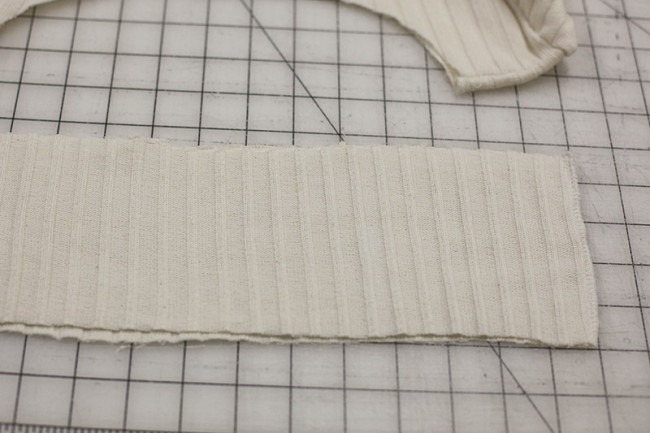
5. Cut the waistband and cuffs. Cut two waistband pieces and two cuff pieces from your tight ribbed fabric.
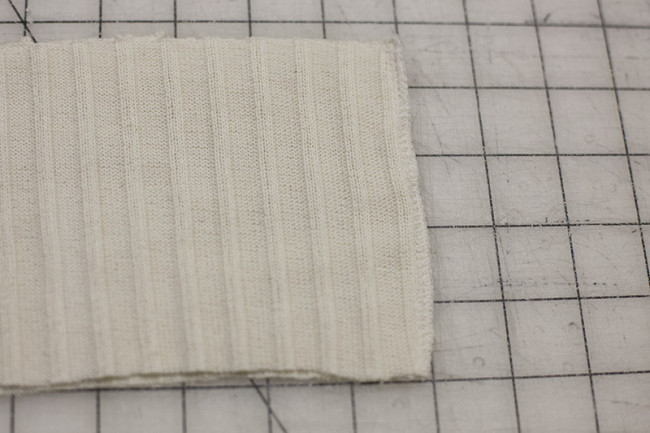
6. Stitch the cuff side seams. Fold each of the two cuffs in half widthwise with right sides together and stitch down the narrow edge to form the side seam.
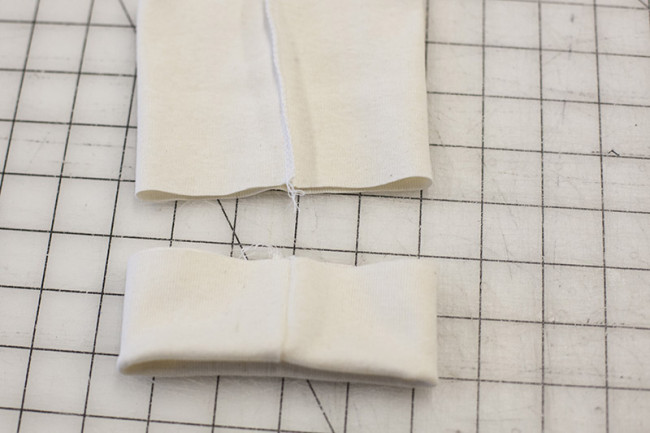
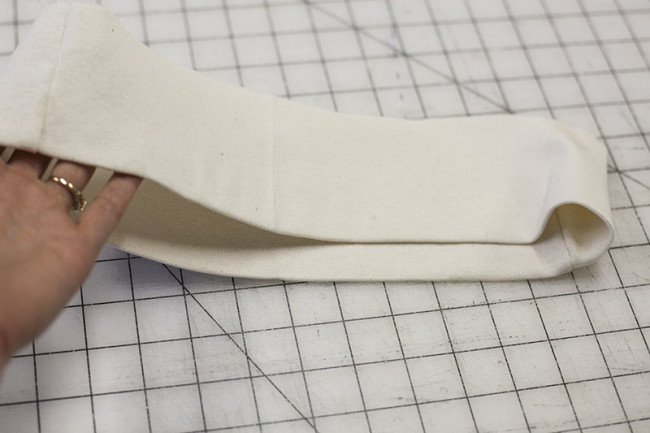
7. Form cuff. Fold the cuff in half lengthwise, with wrong sides together. This is a good time to try the cuff on. It should hug your arm snugly. If it’s too loose, open it up again and reduce at the side seam.
8. Stitch waistband side seams. With right sides together, stitch your two waistband pieces together at both side seams.
9. Form waistband. Fold the waistband in half lengthwist, with wrong sides together. Try the waistband on. Again, it needs to be very fitted to your waist, so if it’s too large, take it in on each side.
10. Assemble the body. Stitch the bodice front to the bodice back at the side seams. Stitch the sleeve together at the underarm. Set each sleeve in the armhole.
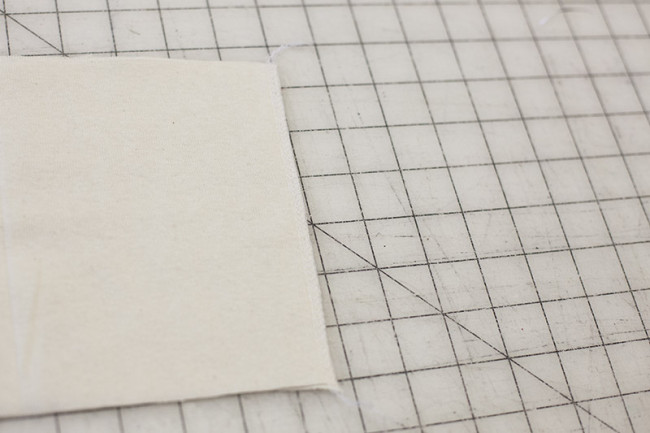
11. Mark the centers. Mark the center front and center back of the waistband. Also mark the center front and center back of the bodice.
You’ll notice that the waistband is slightly smaller than the bodice. This is fine. It will help cinch it in at the waist.
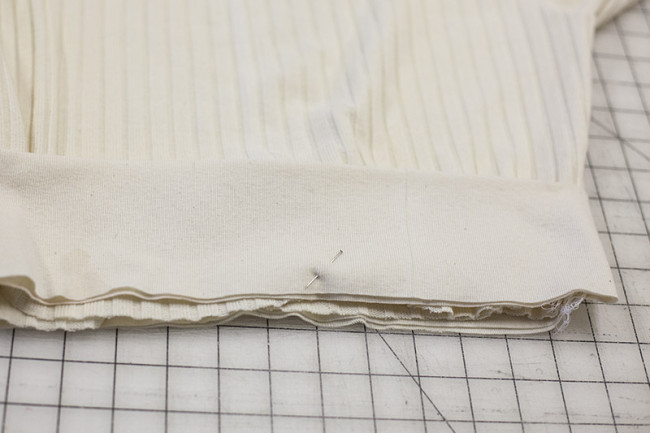
12. Pin the waistband. With right sides together, pin the waistband to the bodice at the waist, matching the centers and side seams.
13. Cut clear elastic. Cut a piece of clear elast a few inches longer than the waistband circumference. Cutting it a little longer gives you extra tails at the end to hold onto.
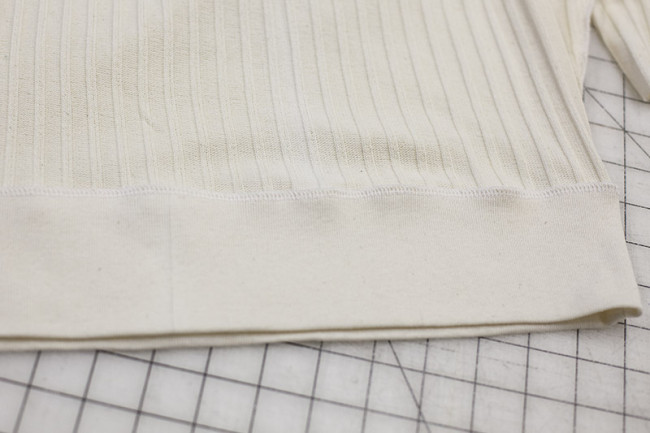
14. Stitch waistband. Mark the circumference of the waistband on the clear elastic. Basially, you want to sew the elastic in a 1:1 ratio with the waistband in order to stabilize it. With the clear elastic on top, stitch the waistband to the bodice. Stretch the waistband and elastic slightly as you sew in order to ease in the bodice.
For a refresher on using this stuff, see our previous post on how to install clear elastic.
15. Stitch the cuffs. Install the cuffs the same way you did the waistband.
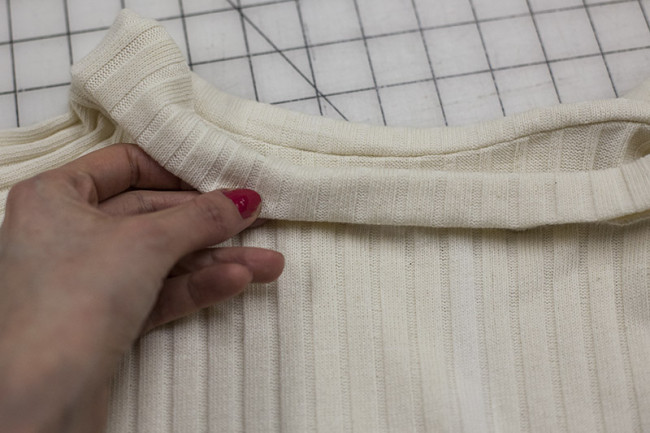
Optional: A ribbed roll collar
Again, you can just install any of the collars that come for free with the pattern. But if you have a ribbed sweater knit, it might look a little funky because te ribs will be running straight up and down.
As an alternative, here’s a simple roll collar you can make.
16. Measure the neckline. Measure your finished neckline. Be sure to account for the seam allowance. In other words, measure 3/8 inches from the raw edge.
17. Calculate the collar piece width. Decide how wide you want the roll. Multiply this measurement by 4. Add 3/4 inch for seam allowances. This is the total width of your pattern piece. We used a collar with a finished width of 1 1/2 inches, so our pattern piece was 6 3/4 inches wide.
18. Calculate the collar piece length. Take your neckline measurement and add 3/4 inches for the seams.
19. Cut the collar. Cut a rectangle of sweater knit with these length and width measurements.
20. Stitch the collar seam. With right sides together, fold the collar in half widthwise. Stitch the seam to form a circle.
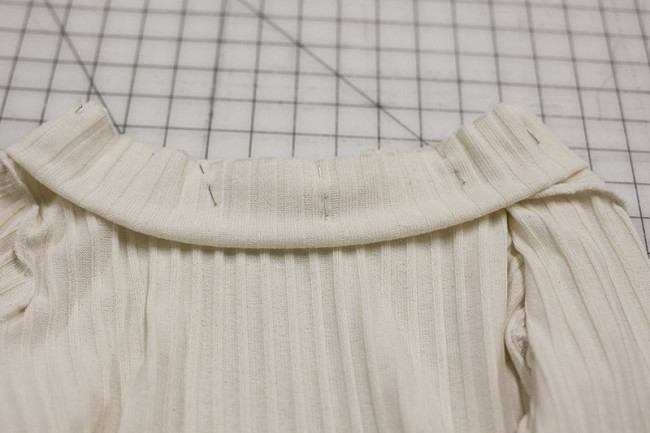
21. Fold the collar. Fold the collar in half lengthwise with right sides together. With the wrong side of the bodice facing out, pin to the neckline, matching the collar seam with one of the shoulder seams. Alternately, you could put the collar seam in the back. Because it’s a sweater knit, this seam will likely be less noticable that the seams on the ribbed bands.
Note that it’s important that the bodice is inside out. This means the seam will be on the outside of the bodice, but it will ultimately be covered up by the collar (just like on the Moneta dresses).
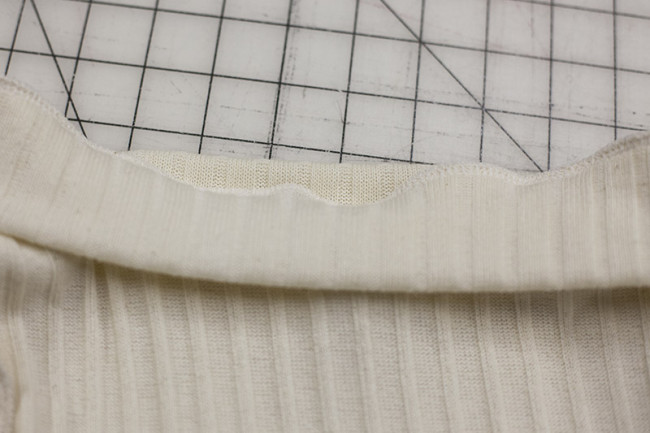
22. Stitch the collar. Stitch the collar to the bodice, using clear elastic to stabilize just like you did for the waistband and cuffs. Be sure to sew the elastic in a 1:1 ratio. The elastic will help the neckline from becoming stretched out.
23. Fold the collar. Fold the collar in half lengthwise to the outside, covering up the seam. Press in place, using plenty of steam.
For many sweater knits, pressing with steam won’t be enough to hold the collar in place and cover up the seam. It depends on the fiber content and stretchiness of the rib. We hand stitched the edge of the collar down for security, using a loose slip stitch. You could also hand take it down in a few places.
That’s it! An adorable sweater in just an hour or two! You can make tons of these in cotton for summer, or look for wool knits in the fall and winter.
Let me know what you think and if you have any questions!
Comments
paige @ Lux Per Diem
May 12, 2014 #
This is so perfect! I was just griping about how I can’t find a cute cropped sweater.
Trisha
May 12, 2014 #
Supercool! I made my first sweater knit in March and was wondering what I could do with a rib knit…now I know! Great project! I bet that would look sharp with my Zinnia, too
Katie
May 12, 2014 #
That’s so cute! I can’t wait to give this a try. I love the pattern hacks!
Tracy
May 12, 2014 #
Thanks for this neat tutorial!
If I didn’t have access to rib knit that matched or went well with the sweater knit used for the main body, would I just use the same method using the matching sweater knit?
Kristen
May 12, 2014 #
Yes, that should work! I’ve been on the lookout for a non-ribbed knit to make this for myself.
Sarai
May 12, 2014 #
Just be aware that it might have a slightly different look, because rib knits are very stretchy and sort of “suck in” the main knit. I think a lot of sweater knits tend to be very loose knits, but it could definitely still work!
I think some good alternatives might be a jersey with a lot of spandex in it, or maybe even using the sweater knit for the waistband/cuffs, but lining it with something tight and high stretch like the jersey/spandex for extra oomph.
Tracy
May 12, 2014 #
Thank you both for those pointers! I can’t wait to try out my first sweater knit project using the Moneta pattern.
Ginger
May 12, 2014 #
This is so cute! I love wearing handmade sweaters, but they don’t come together very quickly. What a nice alternative! Love the cream color, too. It’s so classic!
Kristen
May 12, 2014 #
Right? This weekend I finally picked up a cropped sweater I’ve been knitting for…oh, the past few months. I’m about 6 inches into the whole thing, so it feels like I’ll never get to actually wear it. I love knitting but it’s definitely a hobby whereI have to focus on the joy of the process instead of the final product.
Sarah
May 12, 2014 #
GENIUS!!!!
Lynnmarie
May 12, 2014 #
YYAAAYY! I can’t for the life of me figure out how to knit, but I love handmade sweaters. This fixes it, I shall be making a ton of these!!
Carol
May 12, 2014 #
This is lovely. Thanks for the tutorial.
Amanda
May 12, 2014 #
This pattern is the best. I see many hacks in the future including sweater variations, skirt swaps, and even as suggested by my friend Emily, a sleeveless/lined button-at-shoulder option for my breastfeeding sister in law. Gifts galore! Since it only takes a couple hrs f/ cutting to finish, this is my new favorite.
Thanks!
maddie
May 12, 2014 #
Such a great tutorial! I love this look and want to duplicate it come this summer and fall.
When I was working as a tech designer for knits, we would advise manufacturers to reduce the bands by 10% and stretch while sewing. That percentage was a good, all-around number to start with, and we would increase/reduce depending on the fabric’s stretch/recovery factor (when the first sample came in).
Deanna
May 12, 2014 #
When I first saw this I thought you were cutting down a ready made sweater. But, wow, I didn’t know you could even buy fabric like this. I am now on the hunt!
Thank you so much for such an awesome idea. I also like the fact that I can make it longer if I want to.
RavenNemain
May 12, 2014 #
Love the sweater, and can’t wait to try it; might hack it further as an open cardigan. Thanks for the tutorial!
Is it possible to use regular elastic or something similar instead of clear elastic to stabilize the seams, for those of use who can’t use the clear elastic?
Sarai
May 12, 2014 #
You definitely can, it may just make the seams a bit bulkier. I’d advise doing some test seams to check the look and feel.
Sophie-Lee
May 12, 2014 #
Perfect for our impending winter here in New Zealand! Just need to find the right fabric
melissa
May 12, 2014 #
Her makeup and styling is amazing. So cute!
Miss J
May 12, 2014 #
This is such a great idea. I’ve not knitted for years and this is a great way to get back in to using knit fabrics. In fact, I have a jumper that was stained, so I might just cut off the bad bit and put a rib on the bottom like this.
Thanks for inspiring me to do something different.
Sarah
May 13, 2014 #
Perfect timing, I was just in the process of hunting for a sweater pattern.
Katie
May 15, 2014 #
Wow, what a great idea! How much fabric did it take to make?
Sarai
May 16, 2014 #
Less than a yard, I think (this was the 2XL).
Zippy
May 20, 2014 #
Unrelated to the tutorial, but the model in these pictures is really adorable! I love her smile. :)
fran
May 20, 2014 #
It is easier to sew shoulder seam, then sleeve to bodice, and finally sleeve and side seam all at once.
Amanda
May 22, 2014 #
Brilliant! Thanks for this – it’s lovely when a pattern can be used in such a versatile way! Now just gotta find some sweater knit… ^__^