Tutorial: Rose petal edge, a simple scalloped ruffle
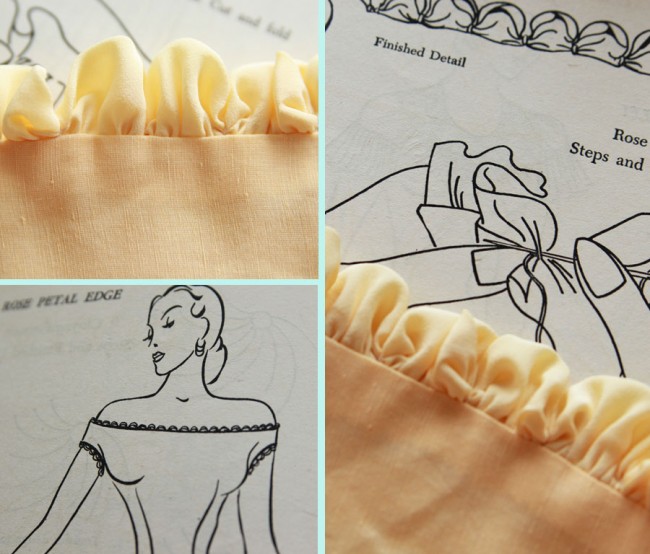
Sarai recently posted about the wonderful book, Stitching for Style. We thought it would be fun to share a couple of tutorials using the techniques from the book.
Today’s tutorial is perfect for adding a pretty edge to hems, necklines, and sleeves. For this project I used a slightly sheer fabric for the edging. I recommend using a lightweight fabric for this project because it will add less bulk to the seam. This edge is really customizable because you can use contrasting or sheer fabrics and play with the width and height of the petals.
The rose petal edge is just a gathered ruffle which is stitched down at even intervals, forming soft “petals.” They’re almost like gathered scallops.
Items Needed
- garment with facing
- extra fabric
- hand sewing needle
- ruler
- fabric pencil or chalk
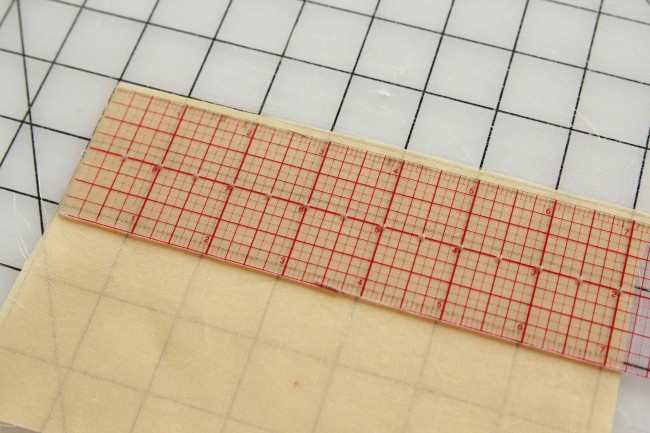
1. Measure the edge you’ll be embellishing. You need 1 1/2 times this number for the length of your bias tape.
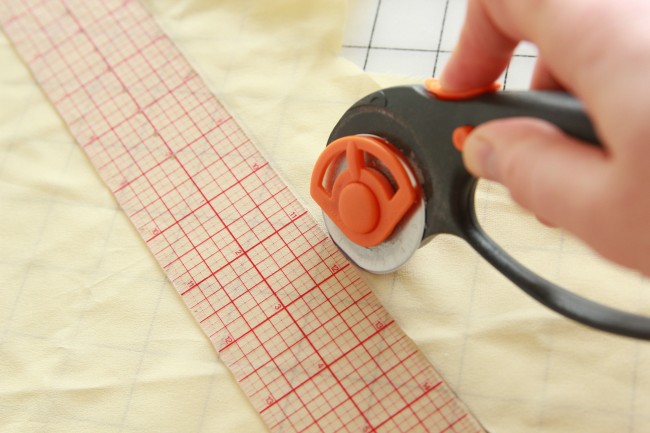
2. The width of the bias tape is up to you, just make sure you add 1 1/4″ for the seam allowance of both sides. For this example, I used a 2 3/4″ wide bias strip. Cut out the bias strip.

3. Fold the bias strip in half lengthwise and pin in place. Sew three rows of basting stitches within the seam allowance.

4. Gather the basting stitches and pin to the edge of your garment. Make sure to spread out the gathers so they are even. Pin the facing piece to the garment. The bias strip is now sandwiched between the facing and the garment.
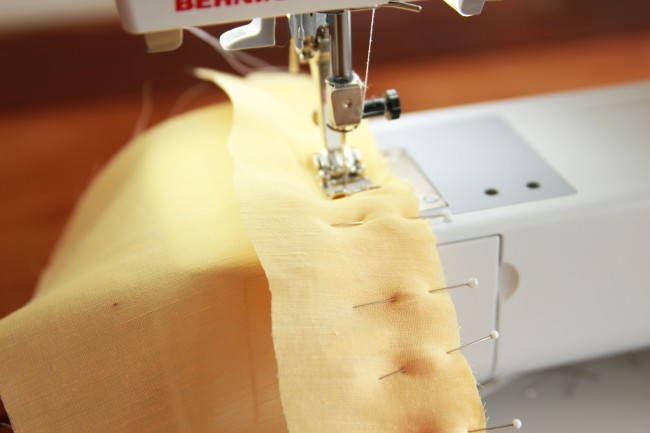
5. Stitch along the seamline. Remove the basting stitches. Trim or finish the seam allowance as desired.
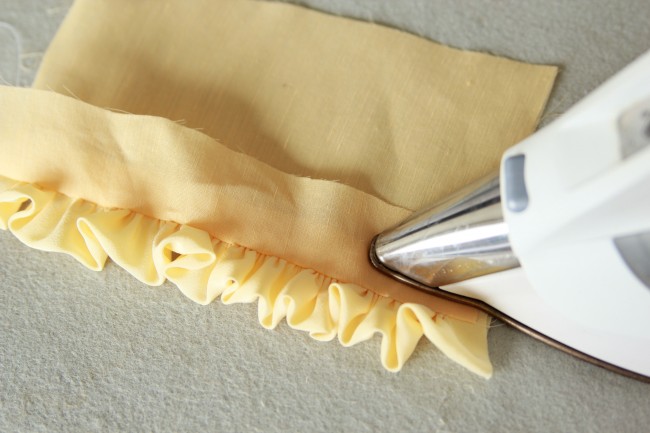
6. Press the seam so that the facing is to the inside.
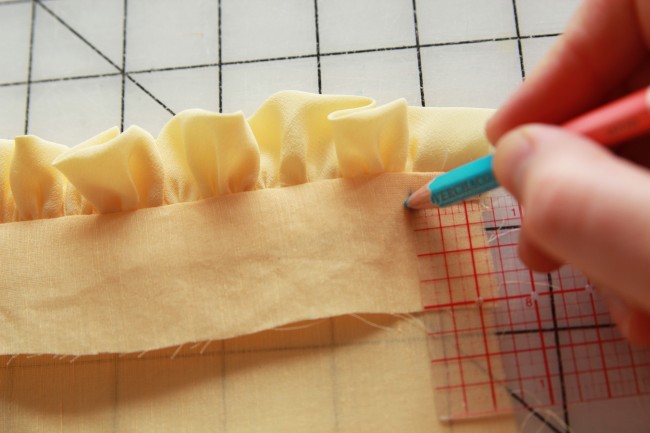
7. Mark 5/8″ from each edge. This is so that the edging will be even and you won’t sew over it when you continue the garment construction.
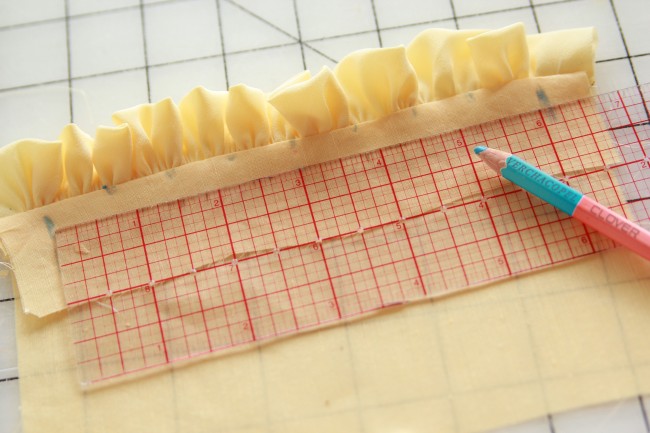
8. Decide how many petals you want by dividing the edge length. For this project, the length is 6″ between the seam allowance. I wanted 8 petals, so the distance between each petal is 3/4″. On the wrong side of the strip, mark the petal intervals.
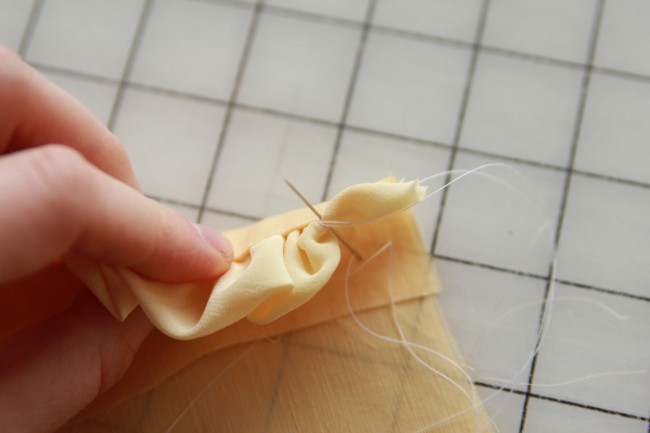
9. With a thread and needle, begin by securing the thread in the seam. Stitch over the marked spot three times, pulling the thread in between the garment and facing. Secure the stitch with a knot.
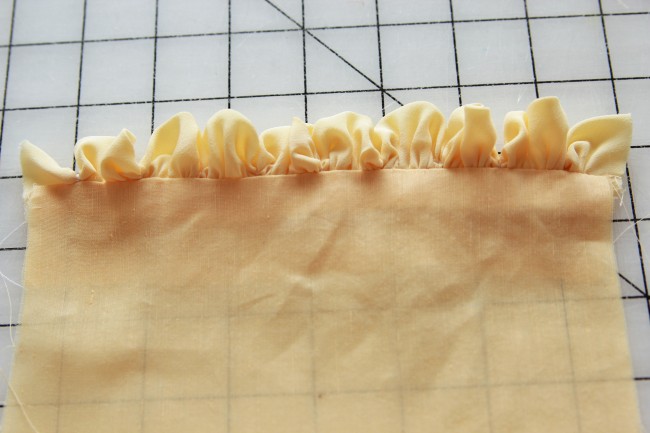
10. Stitch through the seam allowance to the next petal and repeat the previous step until the petals are finished.
This is a really feminine little detail. It would look so pretty on a neckline or sleeve hem, like the illustration from the book, don’t you think?

 Sign In

Comments
JP
July 12, 2012 #
This is beautiful! Did you ever test out what happens if you draw a scalloped edge on the bias tape and then gather it — is the result the same or something crazy looking?
Carolyn
July 12, 2012 #
I don’t know about gathering a scalloped edge, but I do know another way to do this that I actually prefer. If you baste along your strip in a zig zag pattern. By this I mean you ‘zig’ in a straight line from one edge of the strip to the other (or to the seam line) and then ‘zag’ back, and so on. Then when you pull up the basting it forms the scallop/petal shapes on its own. I’ve only done this by hand thus far, so I don’t know if you’d still want two rows of basting stitches doing it by machine or if one would actually suffice. With this technique, however, you get more well-defined curves, which I like. Changing the angle of the zig zag would change the depth of the curves, and the tightness of gathers you pull the strip up into would affect the width of the curves – I think!
Jess
July 12, 2012 #
Very pretty. Would be lovely on the neckline of a simple shift dress or the hem of a straight skirt!
Cinnamon
July 12, 2012 #
Wow! What a deceptively simple edging. Thank you for taking the time to put together a tutorial!
Susan
July 12, 2012 #
A pretty way of edging! Just what I need to finish my plain linen Cambie I’m planning.
summer Dawson
July 12, 2012 #
thanks for the detailed pictures! very helpful!
Nina
July 12, 2012 #
Vintage sewing books can be such a great source of instructions for hand-sewing techniques and details, and I love the old line drawings – but it’s also great to have these updated with clear photographs! Looking forward to more…
Anne
July 12, 2012 #
Wow, thanks! I’ve been trying to finish a dirndl and wanted to do something like this on the neckline, but couldn’t find any instructions on how!
kslaughter
July 12, 2012 #
So pretty! Thanks for sharing~
Kat
July 13, 2012 #
Beauty! You’d never find that in a modern sewing book. Just gold! Thanks for the tut.
Vanessa
July 14, 2012 #
Great tutorial, thank you
MLJF
July 21, 2012 #
I love everything about Colette Patterns and the Coletterie! Sarai’s and Caitlin’s tutorials have saved my bacon more than once–I really feel like I owe you both a lot! I’m wondering if you’d ever consider doing a tutorial on using a French curve.