
 Sign In

8 Tricks for Perfect Topstitching
Topstitching is my secret weapon. It can take a garment from plain to put together, and when executed correctly it can be a stunning detail. I find that so many people are intimidated by this simple technique, because of it’s stand out nature. Mastering topstitching is just a matter of practice and a few key tricks.
Ginger is such a great candidate for topstitching. It offers simple lines, a center front seam, and no drastically curved edges. In celebration of Ginger month here are 8 tips for perfect topstitching.
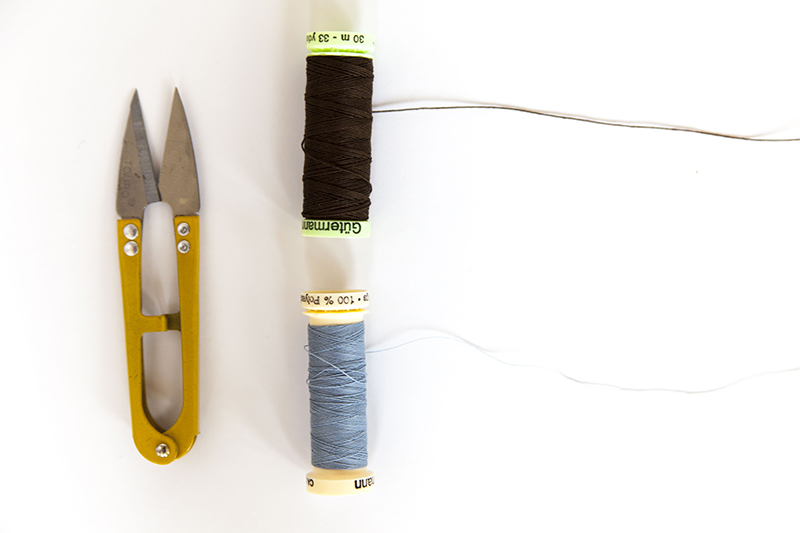
1) Match the weight of your thread to the weight of your fabric. If you are sewing with a medium weight fabric, chances are an all-purpose thread will do the trick. Denims, canvases, and other heavier fabrics may require more substantial topstitching thread. When working with top stitching thread always use all purpose thread in your bobbin.
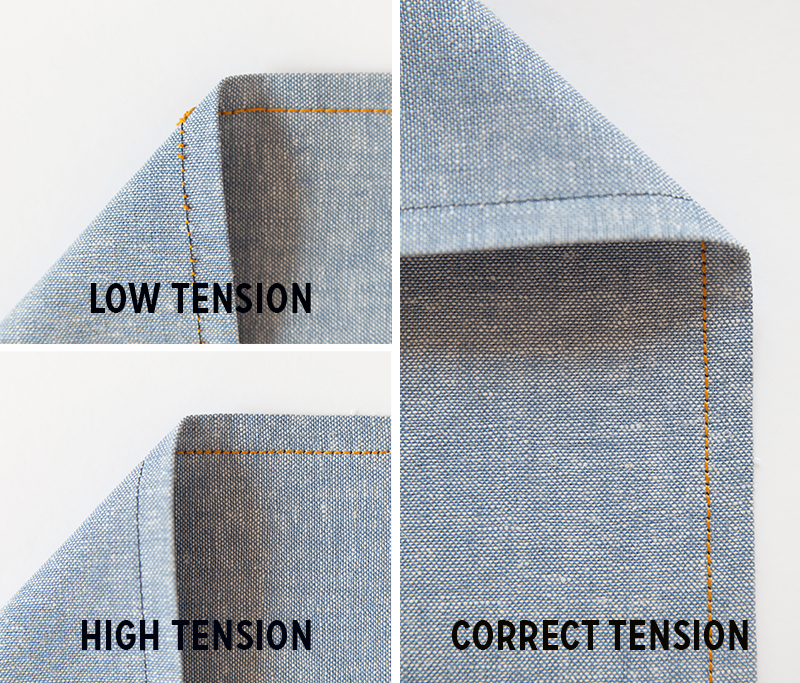
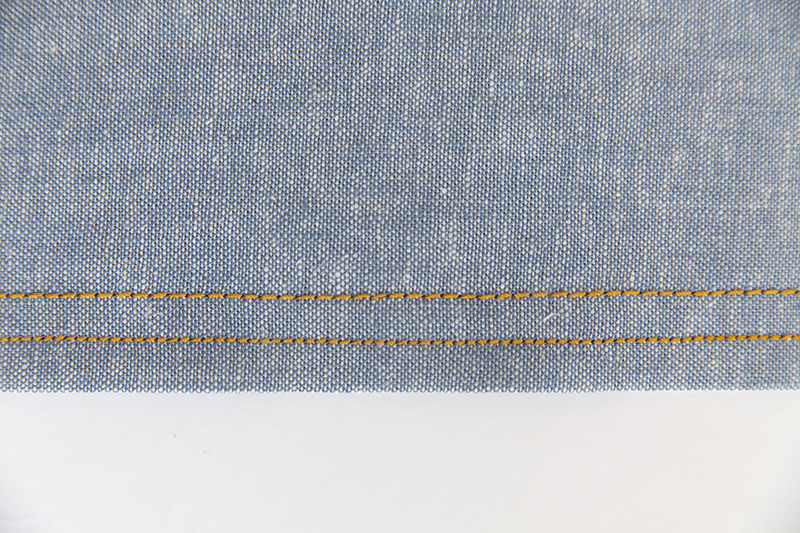
2) Working with topstitching thread may require you to change the tension setting on your machine. Low tension settings will result in loose stitching on the wrong side of your fabric. High tension will cause the bobbin thread to be visible from the right side of your fabric. Correct tension will create a well balanced stitch that is attractive from both the right and wrong side.
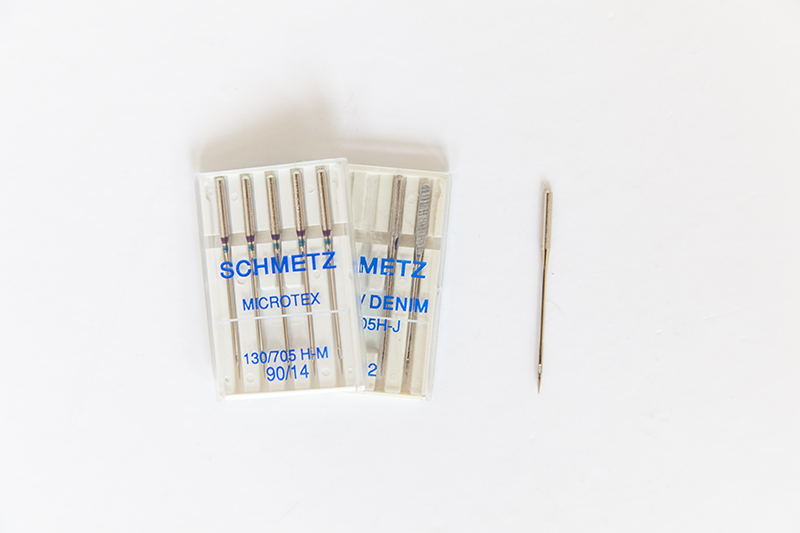
3) Use the appropriate needle. On medium-weight fabrics where all-purposed thread is being used, try a microtex needle. Microtex needles offer an extra sharp tip that create perfectly precise stitches. On heavy-weight fabrics where topstitching thread is being used choose a topstitching needle. This specialty needle has a longer eye to accommodate thicker thread.
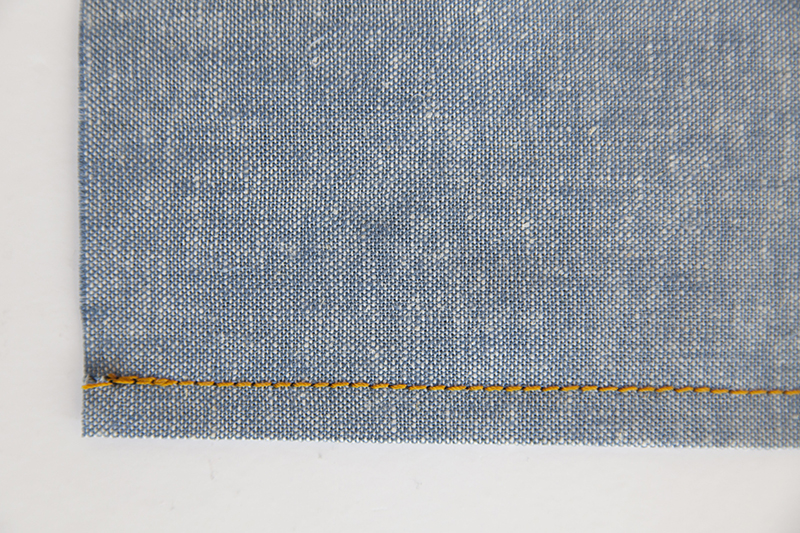
4) Use a slightly longer stitch length. On medium weight fabrics use a stitch length of 3, but heavier fabrics 3.5-4 is more ideal. Using a longer stitch will help you project look neat and uncluttered.
5) There is no need to backstitch when topstitching, as it is a decorative stitch rather than a construction stitch. Backstitching can be visually distracting on your finished garment, and add unnecessary bulk. Instead to combat thread nests, hold onto your thread tails as begin to stitch.
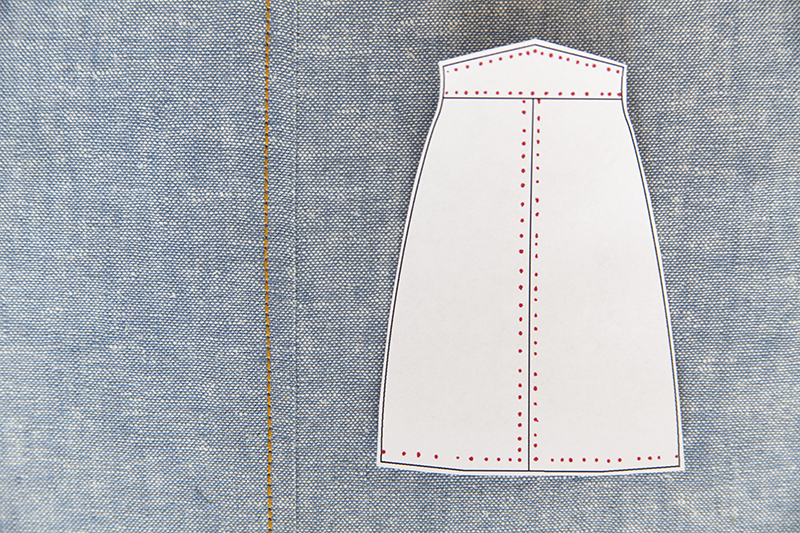
6) Make a plan and stick to it. Draw or print a technical illustration of the garment you are sewing. Take note of where you would like to topstitch and at what width. Cross reference this sketch to your pattern instructions, taking note of when it is the ideal time to topstitch each portion.
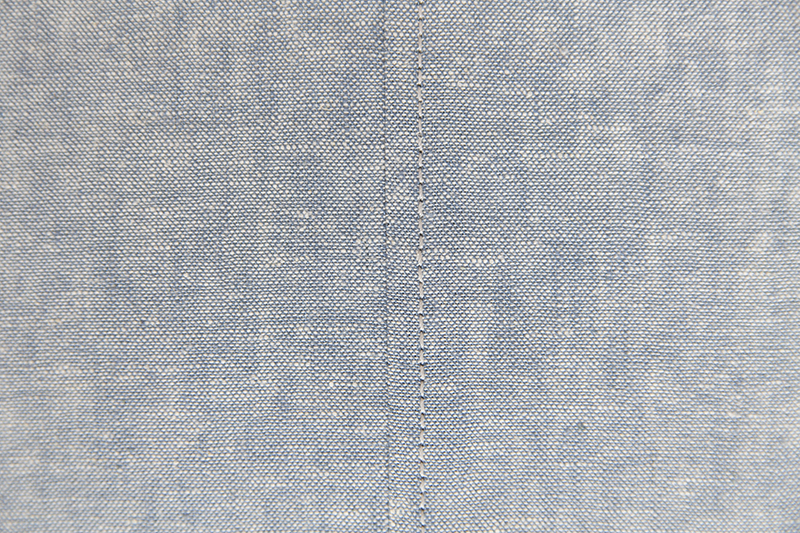
7) The contrast of your thread should be directly proportional to your topstitching confidence. If this is your first project featuring topstitching avoid white stitching on black fabric, instead opt for a more subtle color until you have mastered this technique.

8) Practice, practice, practice, I can not stress this enough. Not only to test your stitch setting but also to improve your skill. Sewing is 25% muscle memory, it is hard to be good unless you train those muscles. So even if you are a topstitching pro, make sure to practice on a scrap of fabric to warm up before diving into the real deal.
Comments
ConnieOI
August 13, 2015 #
Thanks so much! I really needed to see those pictures of tension issues.
Shannon Wignard
August 13, 2015 #
Great post! Thanks for the tips!
Marsha
August 13, 2015 #
Muscle memory….never thought I would hear that away from the piano keys… Great to know that if I practice I may just get better at top stitching!!
Haley
August 14, 2015 #
My fiancé played classical piano for years and we often compare the two!
Marsha
August 14, 2015 #
Wow!! I love playing piano!! I am also taking a course called “learning to learn” and it also emphasizes this principle and how it can be transferred to so many other things we want to do!! Practice really does make perfect!! Thanks for your awesome response:)
Niamh
August 14, 2015 #
As someone who has hesitated to topstitch, thank you for this post! I love the look, but fear messing it up :)
Haley
August 14, 2015 #
Glad to help!
Kate McIvor
August 14, 2015 #
Thanks Haley! Now I know what’s so awesome about microtex needles. The only additional thing I do to get ready for top stitching is experiment with different colors of thread side by side. I have trouble telling what will look best without actually stitching.
Haley
August 14, 2015 #
That is a wonderful tip, thanks for sharing! Microtex are definitely my favorite needles, I used them almost exclusively when working with wovens.
Christina
August 14, 2015 #
Those pictures of correct tension were incredibly helpful for me. Excellent tips.
Shay
August 14, 2015 #
Great post. I also needed the tension pictures. Also, the stitch length.
Piper
August 14, 2015 #
Great post. If only our non sewing tension problems could be so easily solved!:)
Jane
August 14, 2015 #
Thanks for all the helpful hints on topstitching. One other thing that is extremely helpful in getting the top-stitching straight and an even distance from a seam or an edge is to use guides or guidelines. That guide might be the markings on your sole plate, if you can see it. If not, you can measure a distance from the needle to an outer edge and use blue masking tape to create a temporary new guideline that lies outside your sole plate area. You can also use the inside or outside edge of your presser foot as a guide. Another guide might be a sewing machine foot with a guide blade that extends below the base of the foot such as a 1/4″ foot or a hemming foot that can be used either at an edge or by guiding the blade of the foot along inside the “ditch” of a seamline. Another way to create a guideline is to mark the stitching line with chalk. You can also use a twin needle if you want to topstitch two perfectly parallel rows of topstitching. Just remember to always stitch on the right side of the fabric when using a twin needle as the underneath side of stitching is a zigzag stitch. An good hint to remember is to keep your eyes focused on your guide line and where you are going and not focus your eyes at the needle since the needle is not going to move left or right…it is just going to go up and down as always. And don’t forget that your best sewing tools are your eyes and your hands for guiding and manipulating the fabric smoothly under the presser foot as you stitch. I hope these added suggestions help.
Haley
August 14, 2015 #
Thanks Jane! That is all really great advice. When I taught sewing classes I would always tell students that if they kept staring at the needle they might make themselves motion sick. Focusing on a fixed point is so much more helpful!
Ginger
August 15, 2015 #
I teach sewing. This year was the 3rd year working with a 11-year-old girl in 4-h. There was a lot of top stitching necessary. Using the Brother presser foot with the guide blade helped her so much with excellent work. BTW she received a blue ribbon on her first every entry. From the quilted pillow top 3 years ago to a beautiful halter dress with lined bodice, zipper, ruffles on neckline and bottom of skirt and two different fabric prints. Excellent work.
Martha
August 14, 2015 #
I am an experienced sewist and topstitcher, and I still learned a few things from this post (and from the great comments). Thanks, both to you, and to your loyal following.
Londa
August 14, 2015 #
Jane pretty much covered everything I would have added. It’s just that you MUST watch the guide, NOT the needle. I always tell my students, ‘Don’t be a needle watcher’!
Diane
August 14, 2015 #
Another very useful tutorial. Coming from an area that offers no sewing classes or expertise, I am learning so much from Internet sites such as this one. Thank you.
With the thread ends of the top stitching, what do you do with them?
Kathy
August 14, 2015 #
Who knew topstitching could be so interesting? What a great article. Loved the comment about muscle memory. I am a very accomplished sewist, and yes, you can always learn something new. Great article.
Toni
August 15, 2015 #
WARM UP BEFORE I START!! I do that on other arts projects but never thought of it for sewing. Testing, yes, but a real warm up will be so much better.
Krista
August 18, 2015 #
This article was really good–I find that topstitching on canvas can be challenging to master, and I appreciated the tips here.
One thing I would add is that sometimes topstitching thread is not available in the color its needed! I have been known to blend two spools of Gutermann and that’s worked well for me.
Linda
August 19, 2015 #
There are also fabulous stitches on some machines that double or triple sew the same stitch so the top stitching is thicker and will be more visible and not fade into the fabric. WorKs really well for jeans and heavier fabrics.
cynthia
August 21, 2015 #
Thanks for the helpful tips and the equally helpful comments. Stitch length resonated with me! And I can’t always decide WHERE to topstitch. Guess I’m a work in progress…
Judy
August 22, 2015 #
Super article, super comments! Now, if I could just sew like an 11-year old! :-)
Najah
August 23, 2015 #
This is right on time! I think I’ve been putting off the topstitching of a denim skirt because I was waiting to read this. Holding the threads to avoid thread nesting is genius! Also grateful for the AP thread in the bobbin advice. Man, this really saved me.
Erika
August 25, 2015 #
so helpful, thank you
Beal
August 26, 2015 #
Question – why regular thread in the bobbin when using thicker thread on top? I tried that but the stitching looked better with the thick thread in the bobbin, too. Although I might not have adjusted tension settings as much as I should have – I just wanted to finish my project! ;-)
Haley
August 26, 2015 #
In most cases, using topstitching thread in the bobbin will cause tension issues, and sometimes tangling. This is because when the stitch is being created by your needle thread interlocking with your bobbin thread the loop that secures the two threads together usually rests between the two pieces of fabric. When you use two thick threads there is no room for this to occur between the layers, this causes the bobbin thread to sometimes be visible on the right side or vice versa.